A beginner’s guide to Mailchimp for bloggers
I may get paid commission for purchases made after clicking a link in this post.
Mailchimp is a fantastic FREE email marketing tool to help grow your blog and increase engagement, but how do you use it? In this beginner’s guide to Mailchimp I’ll show you how to set up your Mailchimp account, start collecting subscribers, import existing subscribers and send your first email newsletter.
If you are serious about blogging, and especially if you want to make money from your blog, you need to get to grips with email marketing. (Want to know why? Head over to my post on why every blogger NEEDS an email list.)
I’ve already shared in general about how to get started with email marketing and get your first subscribers, what to put in your email newsletter and how to grow your email list with an opt-in offer.
Today I want to show you how you can do all that with MailChimp.
Mailchimp* is a popular email marketing service for many reasons: it’s easy to use, you can make great looking emails without much design ability, you can deliver opt-in offers… But the biggest reason why it is so great is because it’s FREE to get started!
Mailchimp is FREE until you hit 2,000 subscribers, after that you do have to pay, but hopefully once you’ve hit the 2,000 mark, you’ll be making enough money to more than cover the cost.
This makes it a great way to dip your toes into email marketing without having to shell out a lot of money upfront.
I will be honest with you, Mailchimp does have its limitations, (which is why I use ConvertKit for Productive Blogging.) But if your email marketing requirements are simple, it’s more than adequate.
But how do you get started? Here’s my beginner’s guide to MailChimp…
Step 1: How to set up your MailChimp account
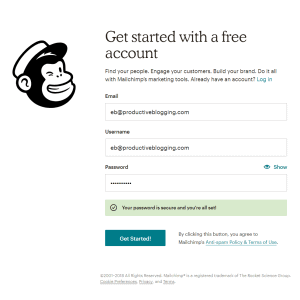
The first thing you need to do is sign up for an account over at mailchimp.com*.
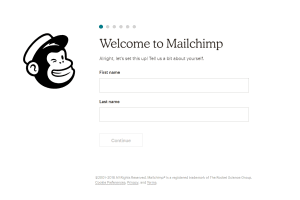
You’ll be sent a confirmation email, which you’ll need to click on in order to activate your account, and then you’ll be taken to this screen, where you can start the setup process…
You’ll need to type in your name, the name of your business (e.g. Productive Blogging) and your website URL.
You’ll also need to give a legitimate physical address where you can receive mail. This address will be automatically included at the bottom of every email in order to comply with international anti-spam laws. If you are happy for this to be your home address, then simply type in your home address. If you’d rather not, then you can use an alternative address, so long as it’s yours (e.g. if you have a shop or an office, that would be a sensible choice, but it must be somewhere that you can definitely receive mail) or you can get a P.O. Box.
There are many companies that will offer you a free P.O. Box, where you only pay if you receive mail (highly unlikely – I’ve not received ANY during the years I’ve been blogging). I use www.ukpostbox.com.
What you are not allowed to do is use a vague address, like one that is just ‘Sussex, UK’ or ‘New York, USA’, and you are definitely not allowed to make up an address. You are actually breaking the law if you do! If you don’t want to use your home address, set up a P.O. Box.
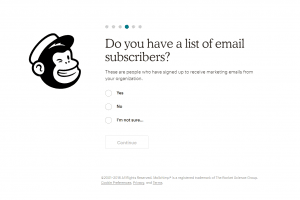
You will then be asked if you have a list of subscribers, and if so how many. You’ll also be given the opportunity to connect your social profiles (you don’t have to do this, if you don’t want to). Finally, you’ll be offered the opportunity to give Mailchimp some information about your business (i.e. your blog) – again, you don’t have to do this right away.
After all that, you may get a screen that invites you to start designing your own email.
You can do this you if you like and continue following Mailchimp’s on-boarding process, but to me it makes more logical sense to start by creating sign-up forms to put on your website, so you can collect email addresses, BEFORE you start creating your first email.
Step 2: Create a subscriber list in Mailchimp
The first thing you will need to do in order collect email addresses, is create a subscriber list (or, as MailChimp calls it, an ‘audience’). This list, or audience, is where Mailchimp will put subscribers when they sign up. You can have as many lists as you like in Mailchimp, so if you have say, 2 different blogs, you could keep a separate list for each blog.
One important thing to note is that if you do have one person who appears on both lists that will count as 2 subscribers towards your free 2,000 subscriber limit. Not necessarily something to worry about if you don’t have any subscribers yet, but something to bear in mind if you do! Where possible stick to creating just 1 list to avoid this.
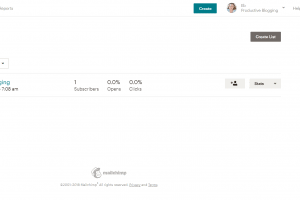
First you need to go to AUDIENCE in the top left-hand corner of the screen. You should then see a screen like this…
Mailchimp may have already created a list for you in the on-boarding process, but to create one from scratch click CREATE AUDIENCE, on the right-hand side.
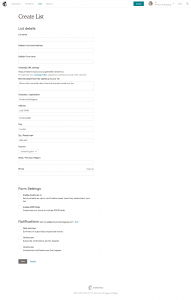
You will then get a form which looks like this…
Fill in the details it asks for and click SAVE. Make sure you enable double opt-in as you will need this to ensure you don’t get fake email addresses joining your list. I personally don’t have the GDPR fields enabled as using double opt-in and being clear about what people are signing up for is sufficient for GDPR, but you can enable this if you want to.
Step 3: Create a form in Mailchimp
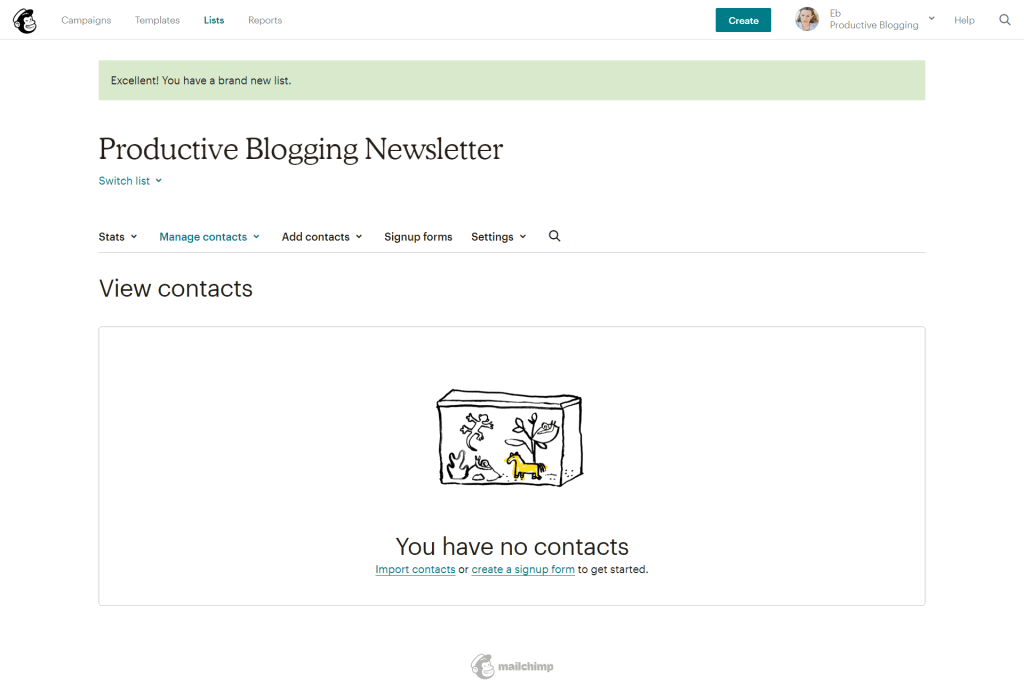
You will now get a screen where it tells you you have no contacts and asks if you would like to either import existing subscribers or create a form. If you have existing subscribers, you can click IMPORT EXISTING SUBSCRIBERS and follow the instructions (see below for more on this), but for the purposes of this tutorial I will assume you are starting from scratch.
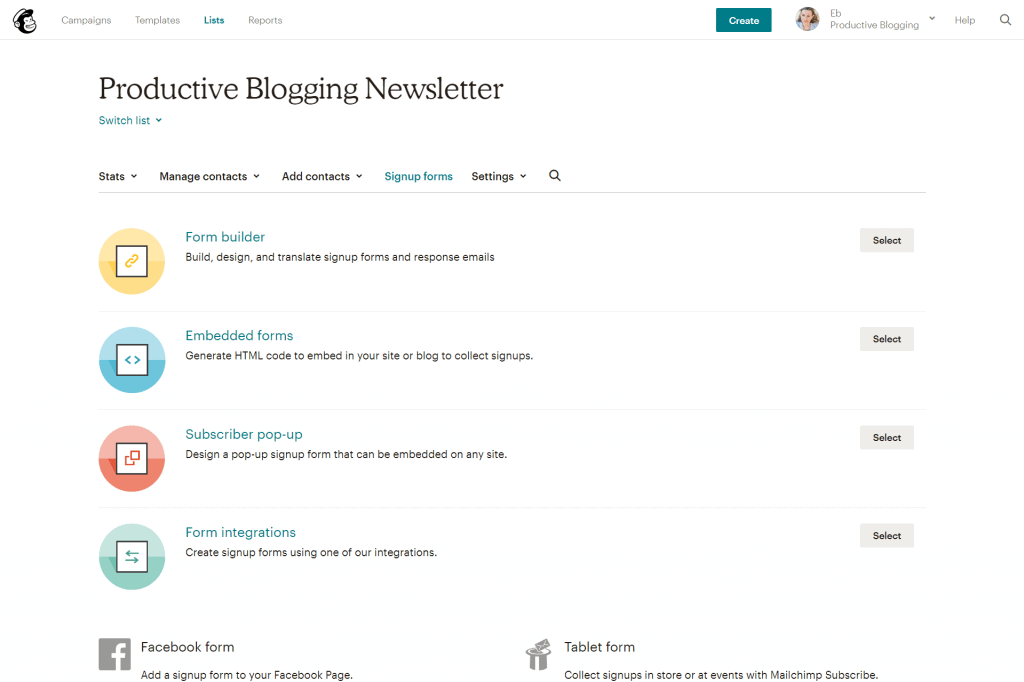
Click CREATE A SIGN-UP FORM and you will be taken to a screen which looks like this…
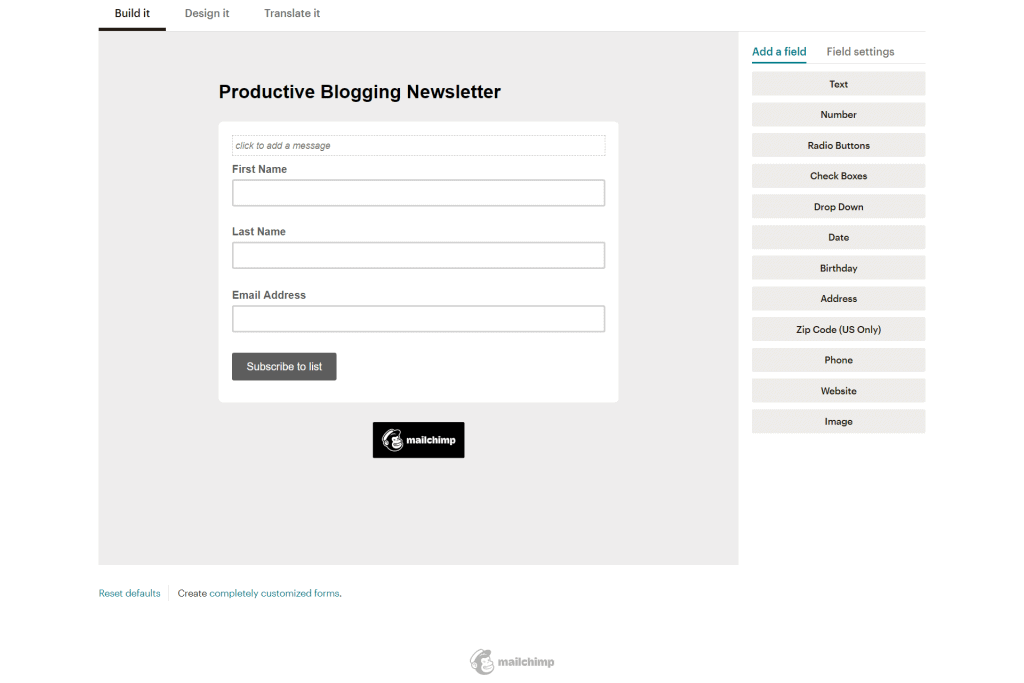
Click on FORM BUILDER to start creating your form. The first thing you need to do is select which fields you want. You need to have an email field obviously, you might also want first name and last name.
To add a field, simply click on the field type you want on the right-hand side.
To delete a field, simply click on that field in the form and click delete. (It will ask you to confirm this by typing DELETE)
To move a field up or down the form, you simply click, hold, drag and release into the right place.
So, if I wanted a form with first name, last name and email address I would end up with something like this…
You can use the DESIGN IT tab above the form to change colours and fonts if you wish, but for now let’s keep things simple.
Your form design is automatically saved, so now you should click SIGN-UP FORMS again and move on to embedding your form on your site…
Step 4: Embed the Mailchimp form on your website
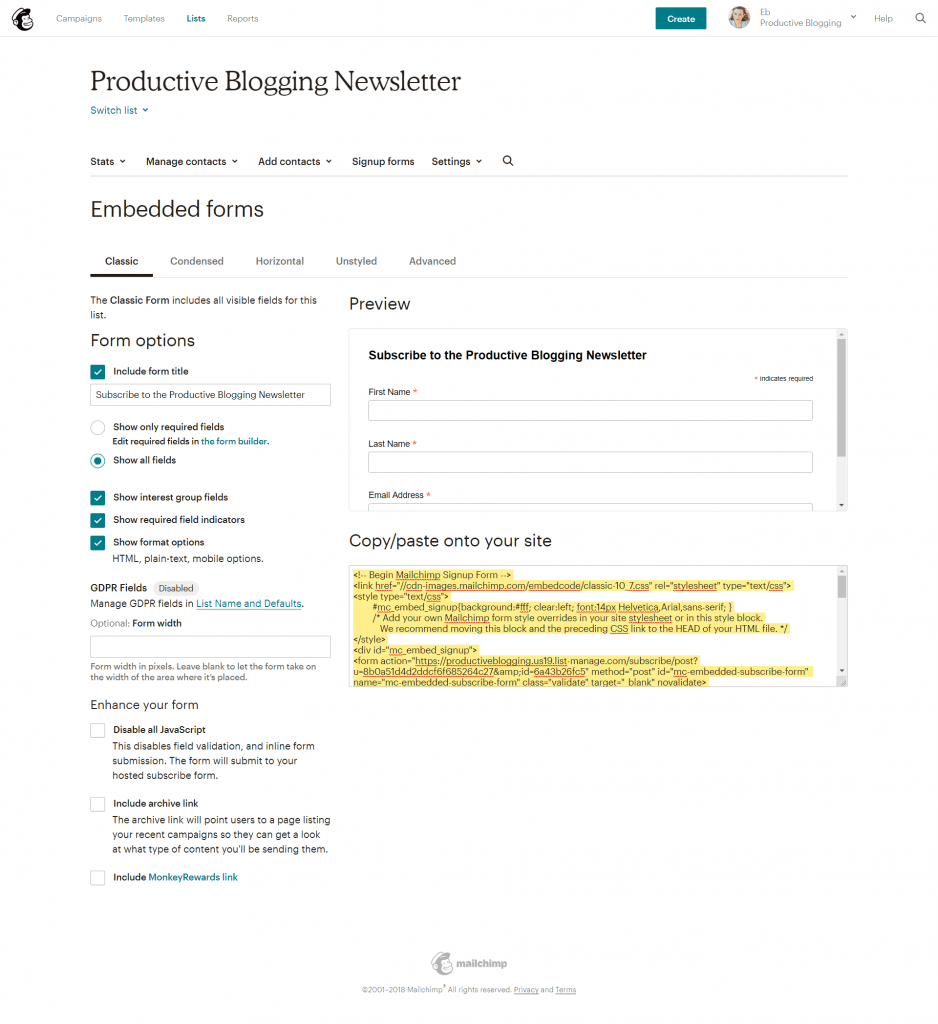
From the SIGN UP FORMS tab, click EMBEDDED FORMS which should take you this page…
You can either keep the default text or change it to personalise it, for example ‘Subscribe to the Productive Blogging Newsletter’. Then copy the html code and paste it onto your site.
You can copy and paste this html code into a html widget on your site and place that widget anywhere you have a widget space on your blog, for example your homepage, your side bar, after your posts – basically anywhere where your theme allows you to put widgets. You can also paste into your text editor on any page or post – for example if you wanted to make a dedicated ‘subscribe‘ page.
Here’s an example of how to embed the Mailchimp sign-up form in your side bar.
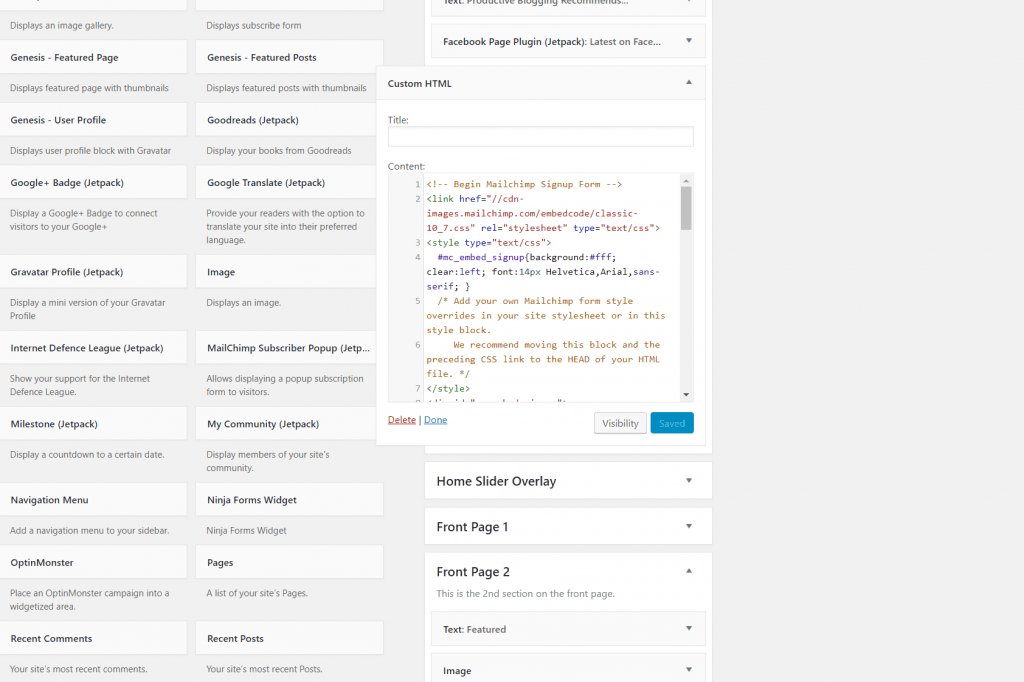
Copy the html code from Mailchimp and then go to your site and go to APPEARANCE => WIDGETS.
Scroll down to find the CUSTOM HTML widget and drag and drop the widget into your sidebar. Paste the Mailchimp HTML code into the widget and click save.
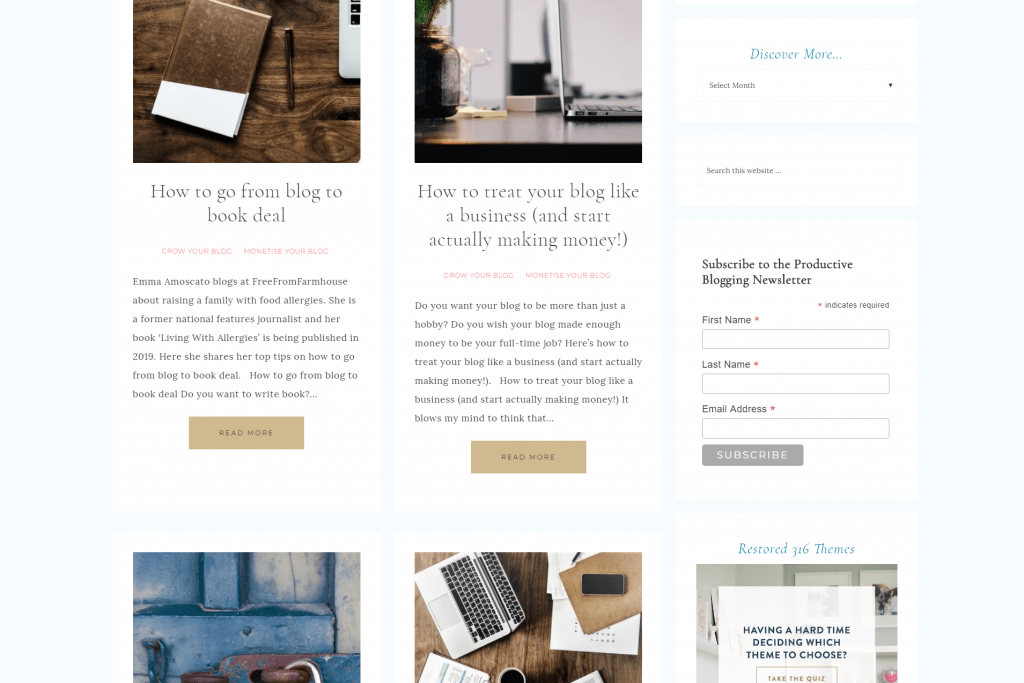
Now go to the front end of your blog and check what it looks like! It should look something like this…
If you are not happy with the styling, go back to the form builder and adjust things on the ‘design it’ tab until you are happy, then go back to the embedded forms section and grab the amended HTML and paste the new HTML into your widget space.
Alternatively, your theme developer may have created email signup forms which match your theme’s styling. In this case your theme developer will most likely have some documentation on how to integrate this with Mailchimp.
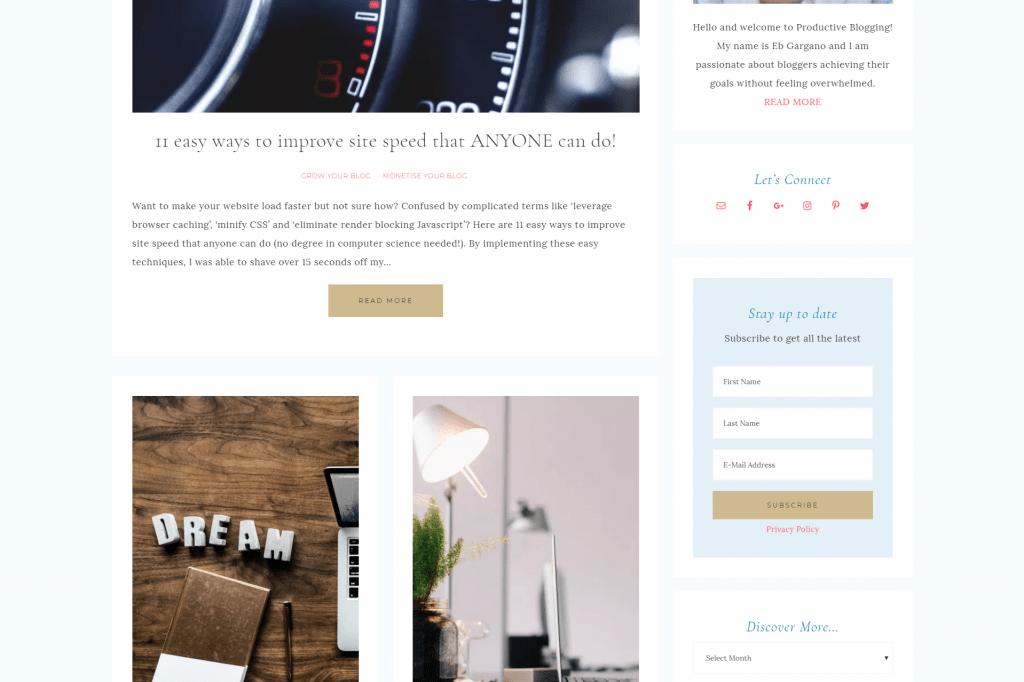
This is one of the reasons I recommend Restored 316 themes so much. They have beautiful sign-up boxes styled to match the rest of the theme and great documentation to help you link it all up so it works with Mailchimp (or ConvertKit!). Instead of the standard sign-up boxes, my sign-up boxes look like this…
Step 5: Test to see if your Mailchimp sign-up box works!
As soon as you have clicked save on your widget, the form will be live and capable of collecting email addresses. I suggest the first thing you should do is check that it works. Type in your own details and click ‘subscribe’. You should be given a prompt to go and check your emails.
Click on the confirm link and then go back to your Mailchimp account. Click on AUDIENCE in the top right and then click on the name of the new audience you created. If all has gone well, the email you just used to subscribe should be sitting in there as your very first subscriber!
Step 6: Upload existing contacts into Mailchimp
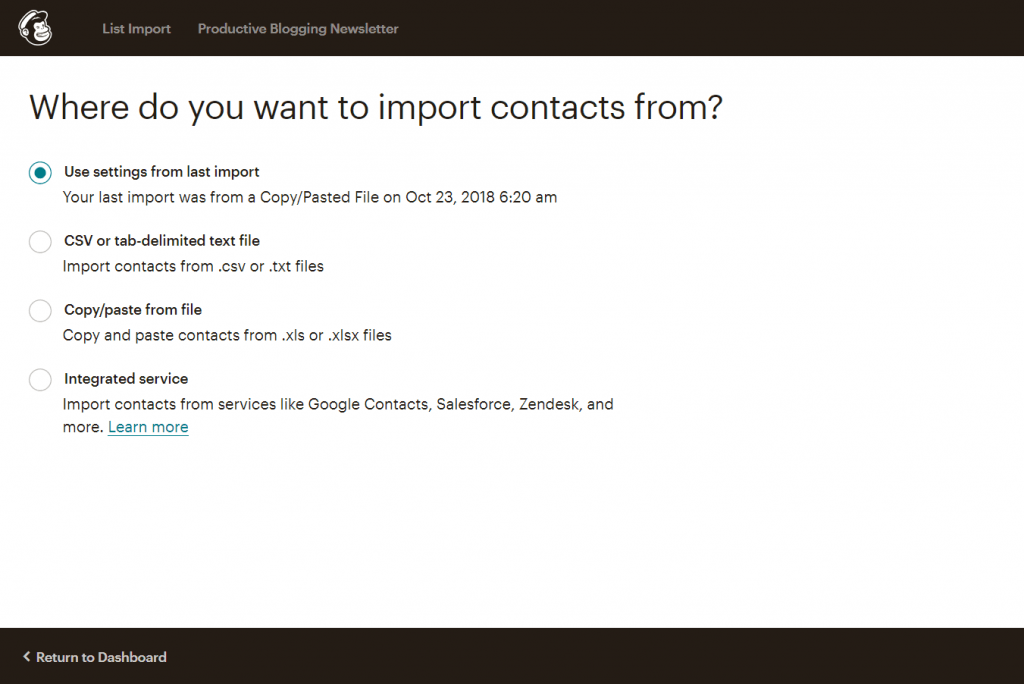
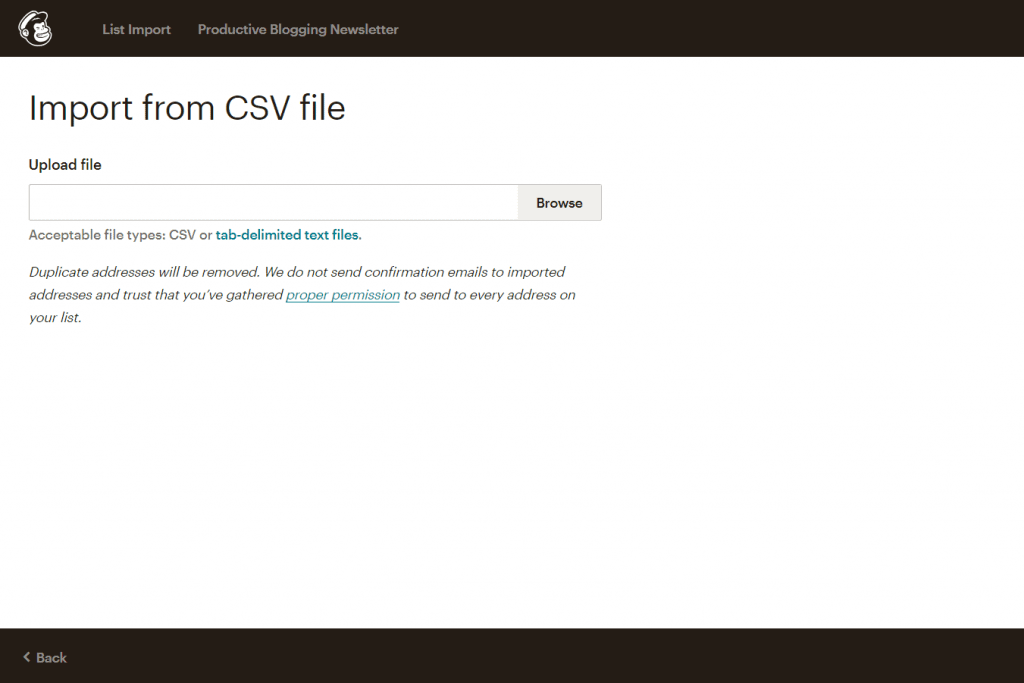
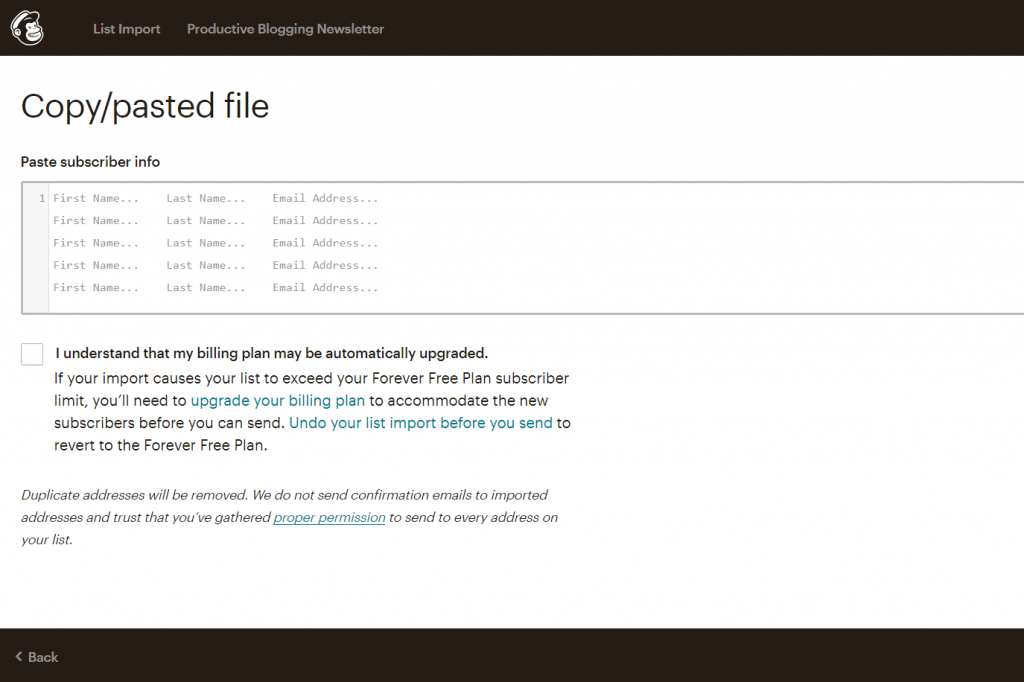
If you already have existing subscribers, it’s very easy to add them into Mailchimp. Go to AUDIENCE in the top left and then select the audience you wish to add contacts to. Click ADD CONTACTS and choose IMPORT CONTACTS. It will give you 3 options: ‘import from CSV’, ‘copy & paste from file’ or ‘integrated service’. (N.B. If you have already imported some subscribers it will give you a 4th option to ‘use settings from last import’.)
The simplest way to import contacts into Mailchimp, is by CSV. Your existing email service provider should provide you with the option to export your subscribers as a CSV file. If this is the case, then do that first, then choose the CSV option in Mailchimp and click NEXT in the bottom right. You will be prompted to upload your CSV file.
If you cannot download your existing contacts as a CSV file then select COPY/PASTE FROM FILE and simply copy and paste the names and email addresses into the form you are given. You will then be taken to a screen where you have to name the columns you have copied across.
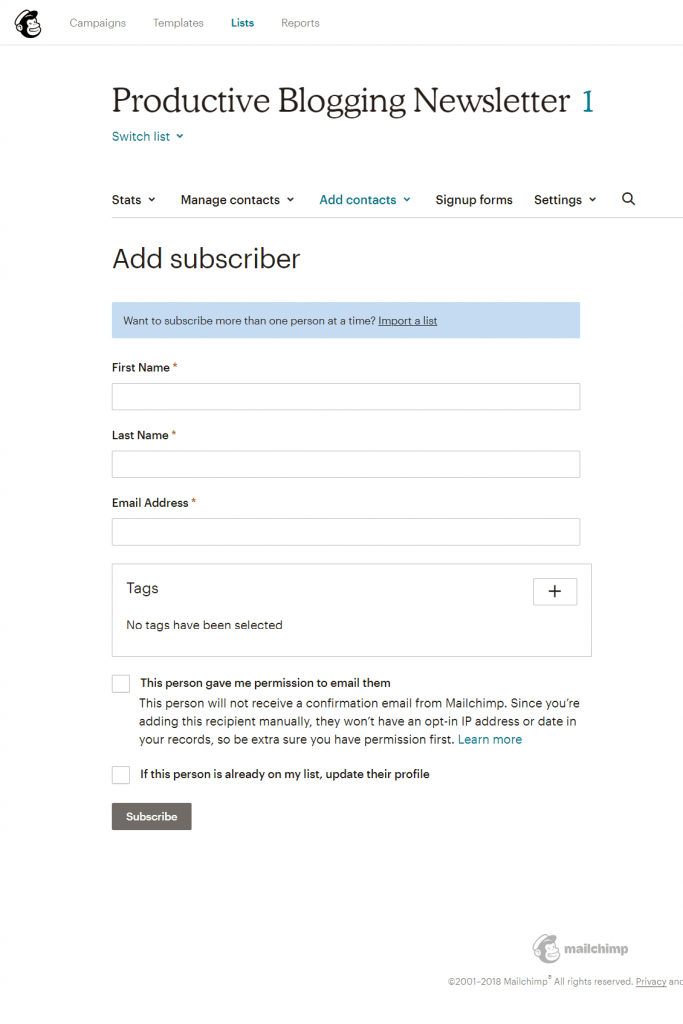
If you just have 1 or 2 email addresses to add, then you may find it simpler to go to AUDIENCE=> select the audience you wish to add contacts to => ADD CONTACTS => ADD A SUBSCRIBER and fill in the form.
In all cases, make sure you have permission to add that subscriber to your list. It is against the law to add people to your list without their express permission.
Step 7: Create your first newsletter in Mailchimp
Now that you have a way of capturing email addresses (and you know that it works!), you need to create your first newsletter. Mailchimp calls these ‘CAMPAIGNS’
Create a new campaign
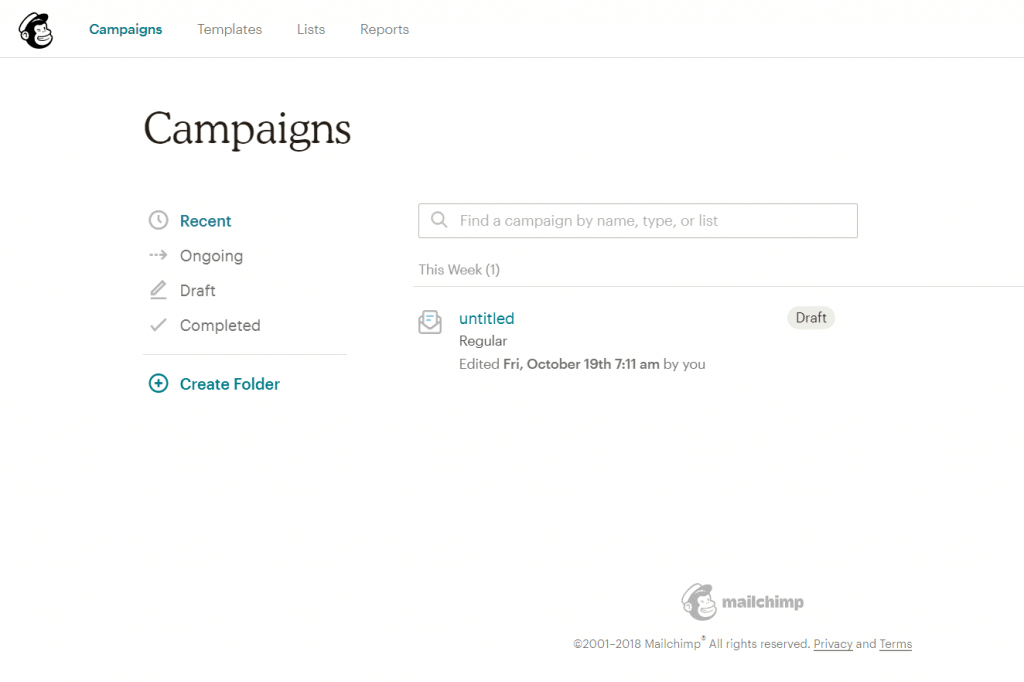
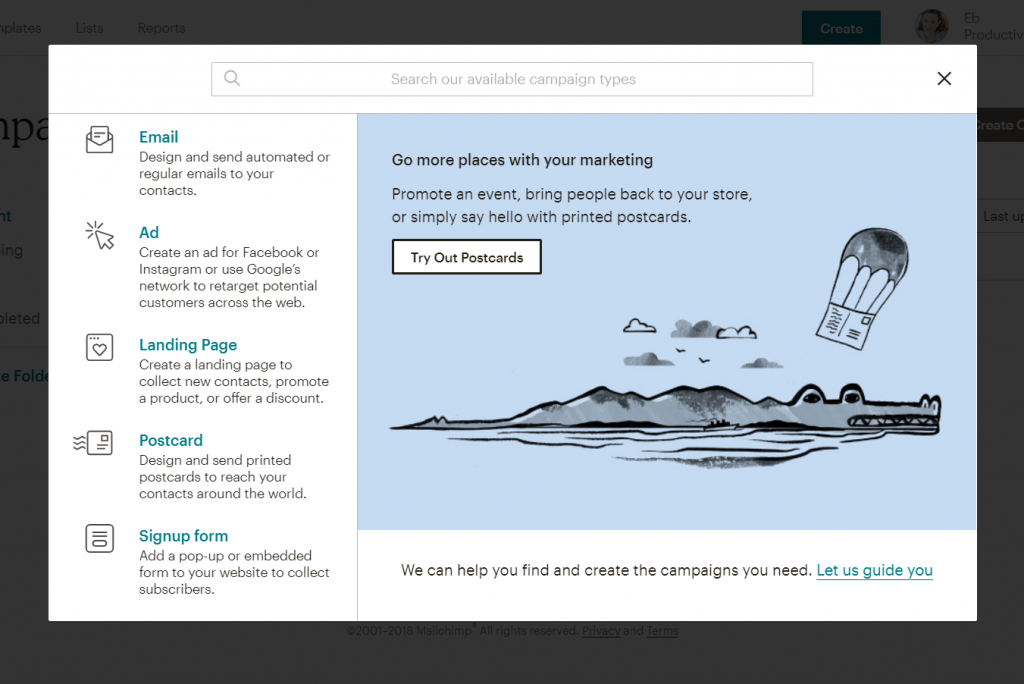
Click on CAMPAIGNS on the top left and you will be taken to this screen
Click CREATE CAMPAIGN in the top right and you get this screen.
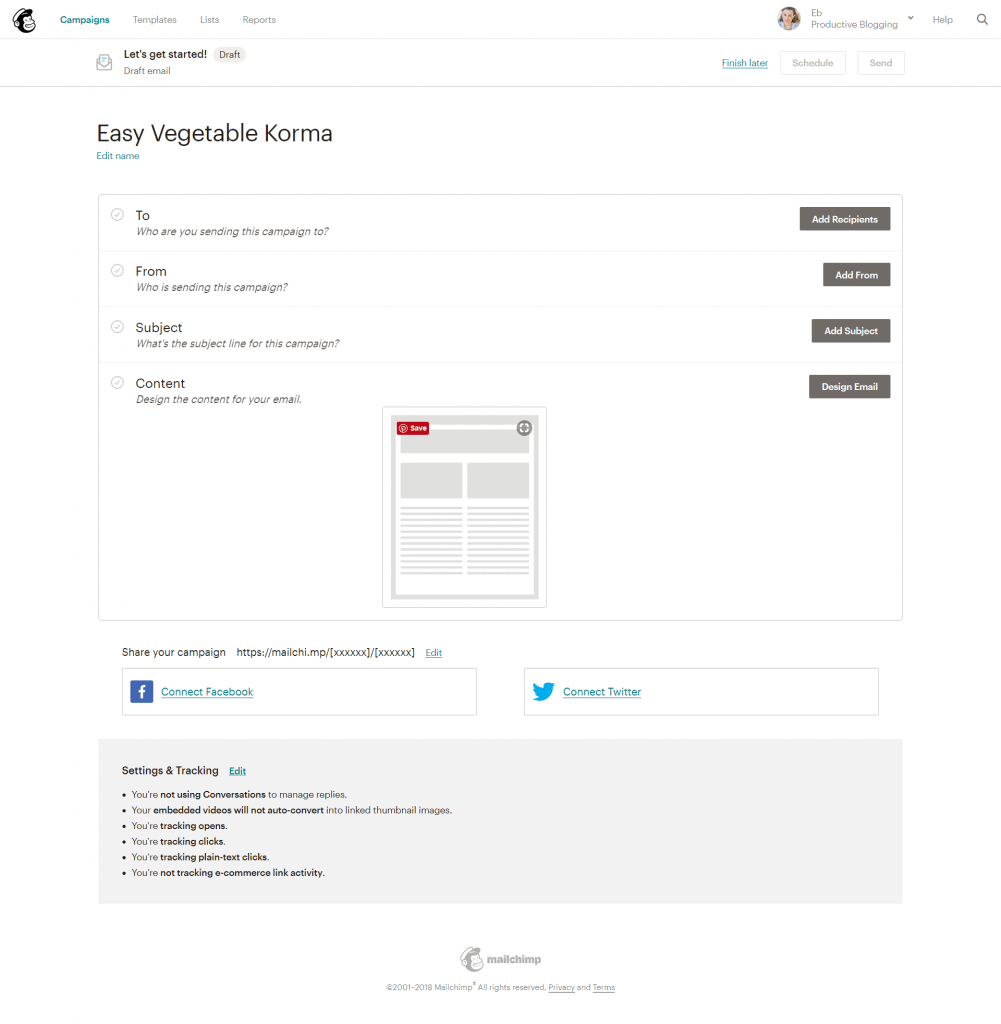
Click EMAIL and name your email. You can either call it something simple like ‘Newsletter 1’ or something that will remind you what the email contains like ‘Easy Vegetable Korma’, then click BEGIN.
You should see a screen like this…
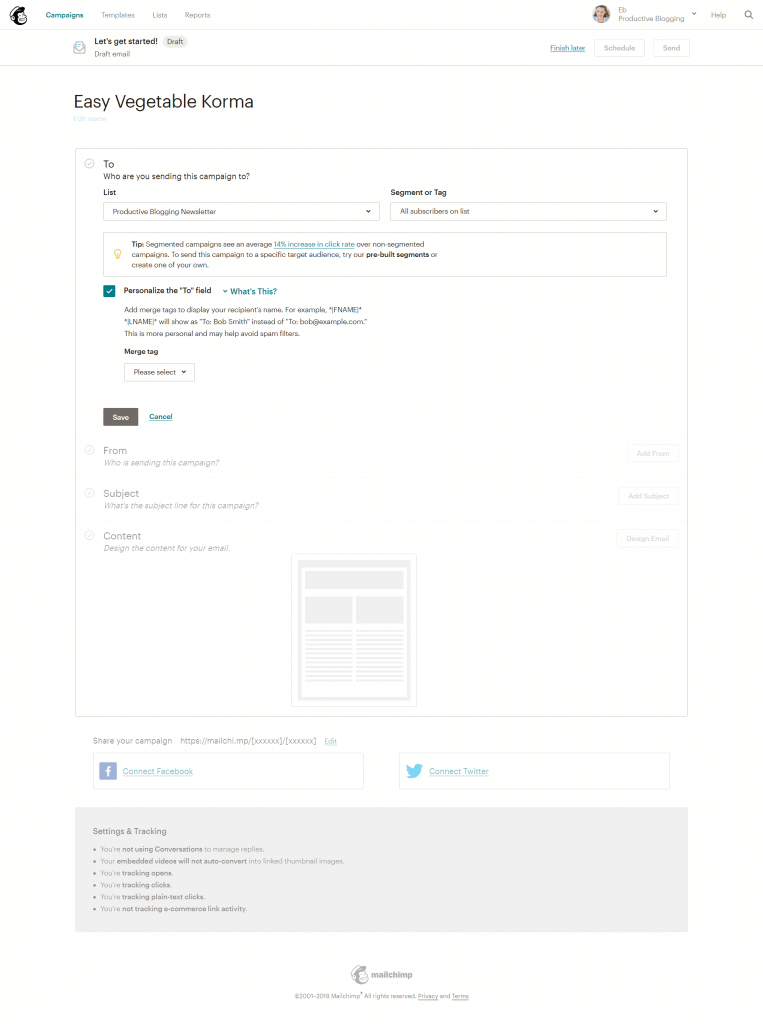
Edit ‘to’ and ‘from’
Now click TO and select the email list you created from the drop down menu. I also like to tick PERSONALIZE THE TO FIELD as I think it looks nicer when an email arrives in my inbox, but you don’t have to.
Edit the FROM section, if necessary. In the NAME field, choose either your own name or the name or your blog, or a combination of the two, e.g. Eb @ Productive Blogging. In the email address field use the email address you wish the email to appear sent from. This will also be the email address your subscribers reply to if they hit REPLY.
Edit the subject and preview text
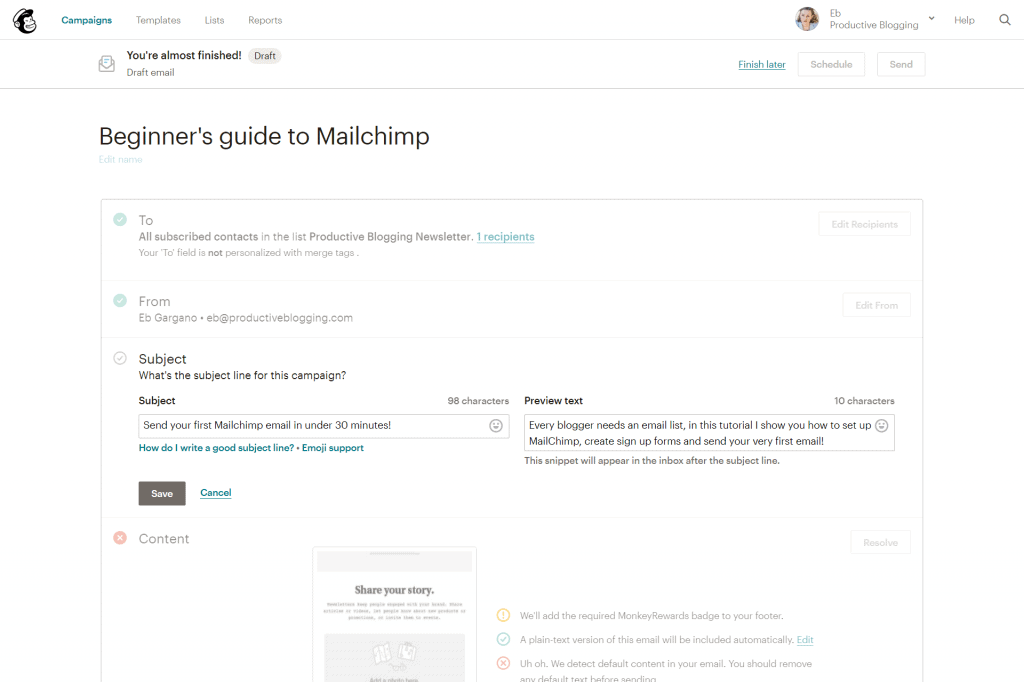
Now click SUBJECT and type in the subject of the email exactly as you want it to appear in your subscriber’s inbox. For example: ‘Productive Blogging Newsletter’ ‘How to send your first email newsletter’ or ‘Easy Vegetable Korma’.
I would strongly advise you to use a better subject line than ‘Productive Blogging Newsletter’. I don’t know about you, but I often delete emails which are just called ‘newsletter’, but I would be much more likely to open it if it said, ‘A beginner’s guide to MailChimp’ or ‘Send your first email newsletter with MailChimp in just 30 minutes!’
Next to SUBJECT you have PREVIEW TEXT. This is the text your readers will see in their preview pane before they open your email. This is another chance to encourage your subscribers to open your email, so make the most of it. Say something like ‘Having an email list is essential for every blogger, here’s how to send your first email with MailChimp…’ or ‘Quick easy and packed with goodness, this delicious vegetable korma can be made in just 30 minutes’ NOT ‘Welcome to my newsletter’ or worse leave it blank! When you are done click SAVE.
Design your email
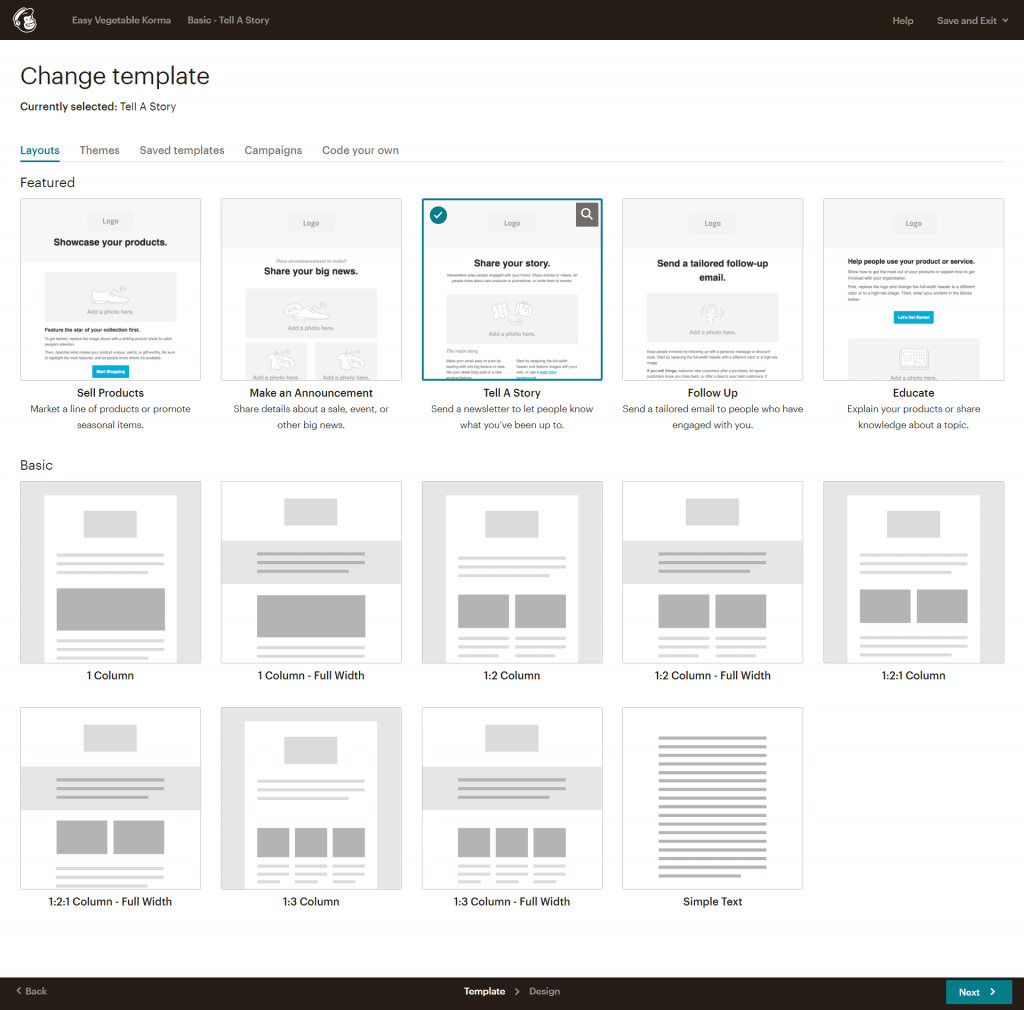
Now comes the fun bit! Click on DESIGN EMAIL and then select a template that you like the look of. For the purpose of this tutorial, I am going to select the TELL A STORY template. But it really doesn’t matter which one you choose, as you can change design elements of it as you go along.
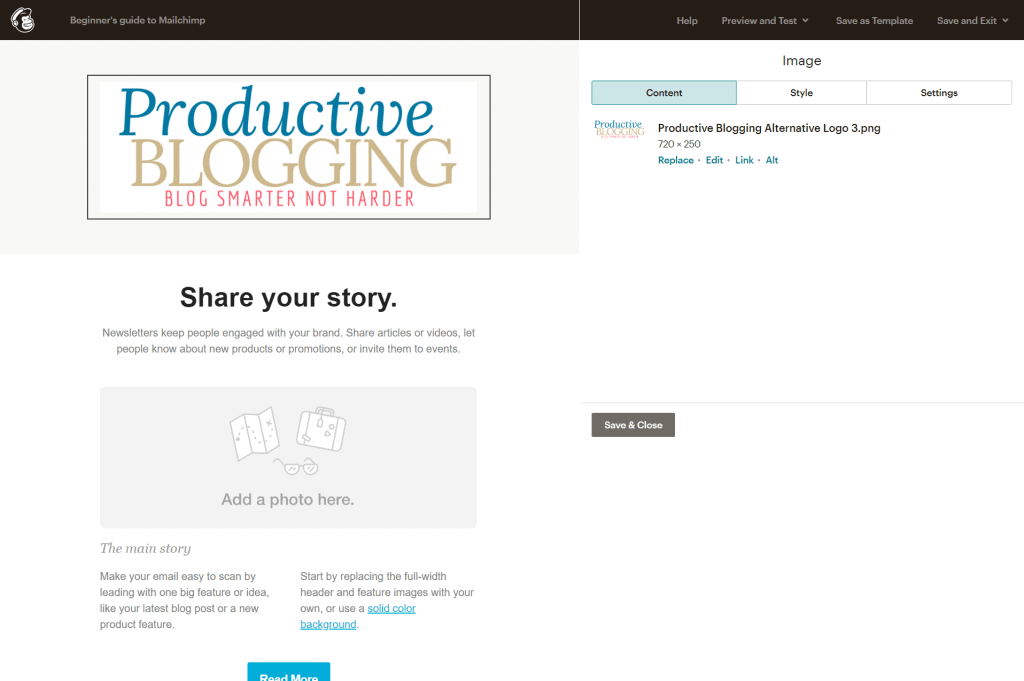
Now click on each area to personalise, so for example to add your logo, hover over the logo area and click the edit symbol (the pencil) Over on the right-hand side you will see an editing screen pop up. Click replace and then upload your logo. You can add a link to this photo if you want (e.g. to your homepage)
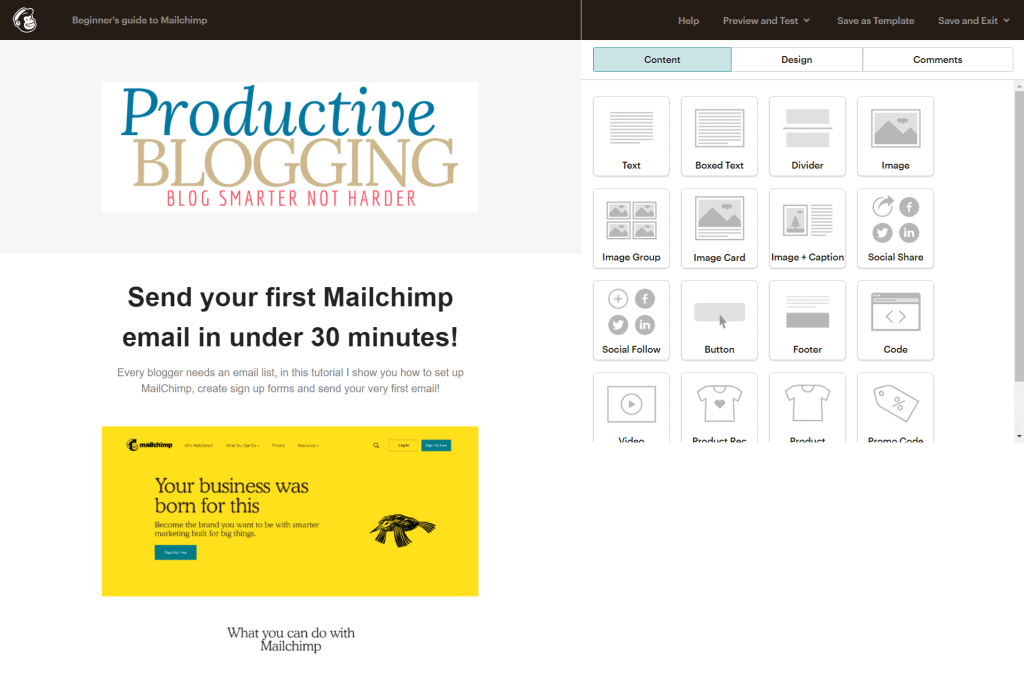
Next click in the text box below and edit. You might want to put a personal message here, or you might want to go straight into advertising your latest post. Like this…
If you want to change the font/size/colour etc. you can do all that on the editing screen, but I would suggest avoiding fiddling too much for now. It’s all too easy to get carried away with tinkering round he edges, rather than getting on and getting your email out there.
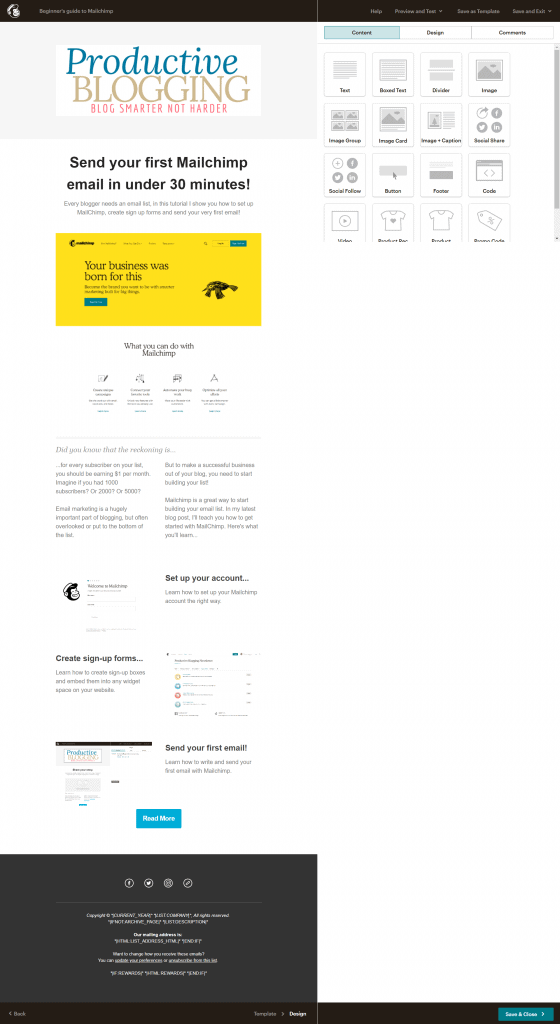
Next you can add a picture, more text and so on to fill up the template, until you have something which looks like this…
Adding extra elements to your email
On the left hand side, you will notice a lot of different options which you can add into the email you are writing. If you want to add one of these elements into your post, simply drag and drop it where you want it to appear, then edit it as above.
These are great to play with once you’ve got the hang of it, but for now let’s keep things simple!
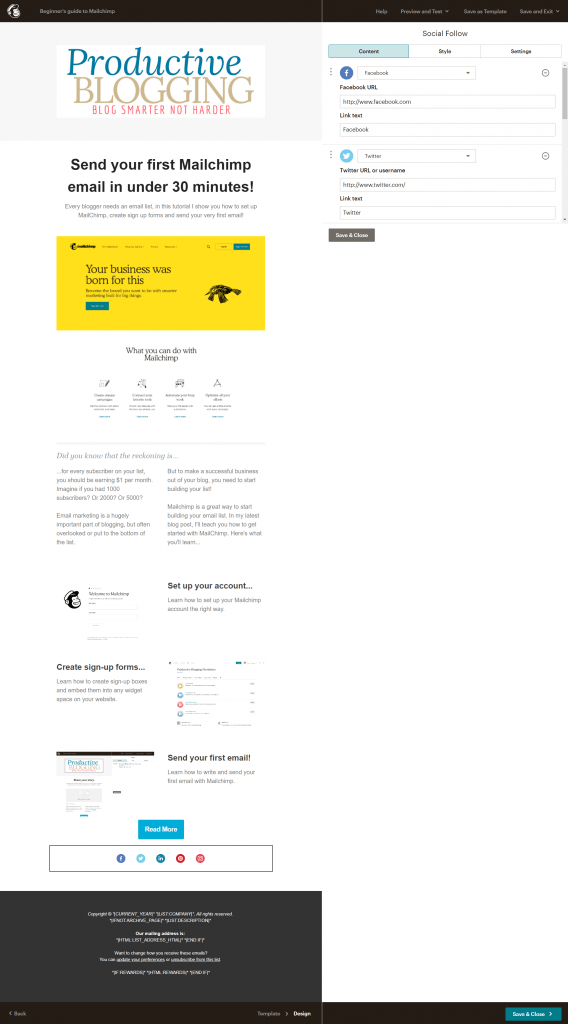
One thing you should do before sending your email is add or edit your social follow buttons. This gives your readers the opportunity to find and follow your social channels. Simply drag and drop this element where you would like it to appear in your email, then fill in the details of your own accounts so that when a reader clicks on the buttons they get taken to your social channels.
Preview your email
Once you are happy with the content of your email, you can check how it will appear to readers, both on desktop and mobile by clicking PREVIEW AND TEST in the top right and selecting option 1: ENTER PREVIEW MODE.
If you wish to see how this looks in your own emails you could click option 2: SEND A TEST EMAIL and send it to yourself.
Send or schedule your email
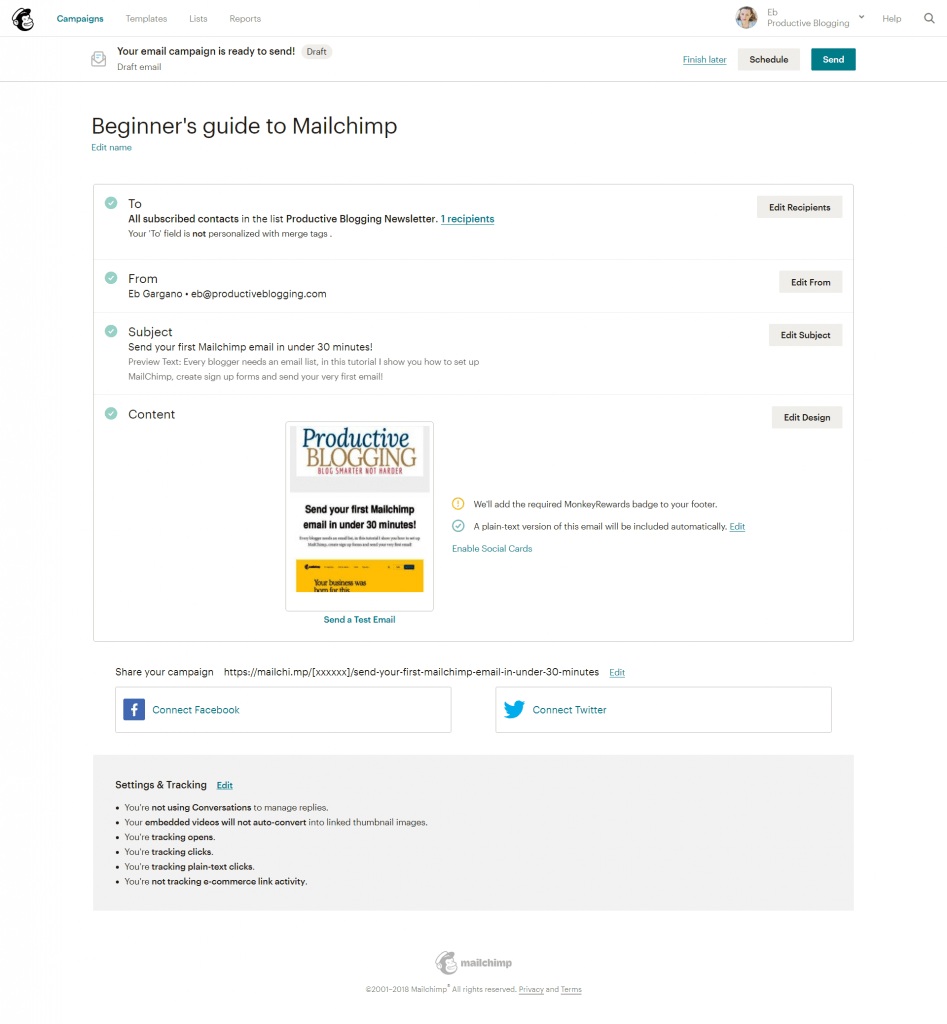
When you are happy with your email it’s time to send it! Click SAVE AND CLOSE in the bottom right and you will get back to this screen.
If you wish to send your email right away, click SEND, then SEND NOW.
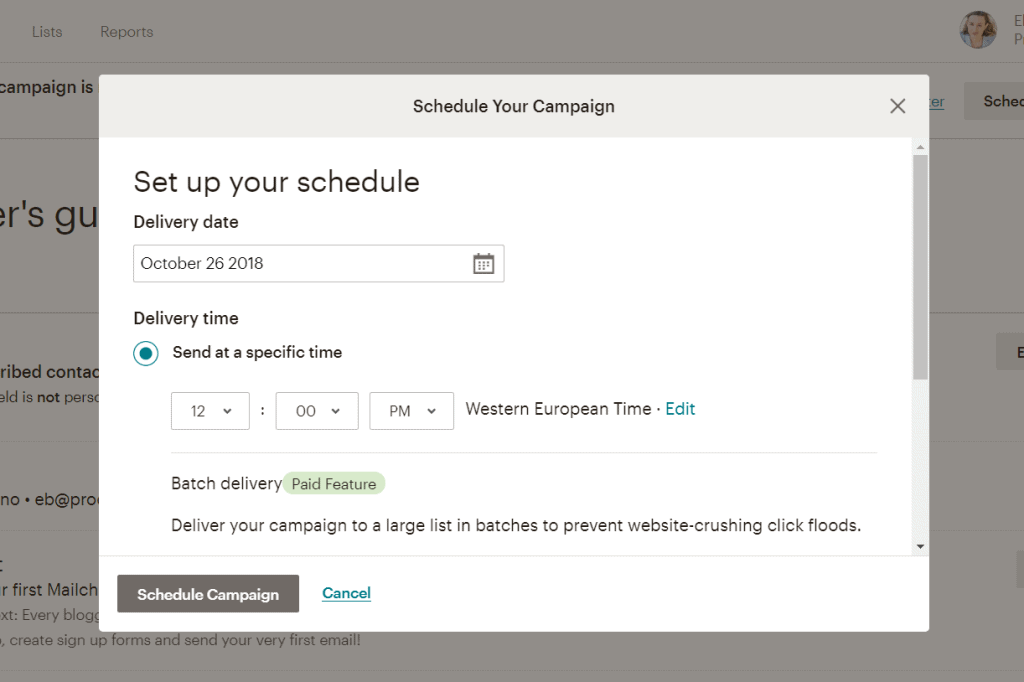
If you wish to schedule your email for a particular time, click SCHEDULE, then choose the time and date you wish to send the email and click SCHEDULE CAMPAIGN. Just make sure you check you have the correct time zone before you do! To change this, simply click EDIT next to the time zone and select your time zone.
Congratulations you’ve done it! You’ve created your Mailchimp* account, created and embedded sign-up forms on your website to capture new subscribers, uploaded existing subscribers and sent your first email.
I’d love to know how you get on and/or if you have any questions! Let me know in the comments below…
Want MailChimp to automatically send out your latest blog post? Then check out my guide on how to set up an automated email newsletter with Mailchimp >>>
- What to put in your email newsletter – 11 ideas to really connect with your subscribers!
- How to avoid paying for unsubscribed contacts in Mailchimp
- How to set up an automated email newsletter with Mailchimp
- How to grow your email list with an opt-in offer
- A beginner’s guide to Convertkit
Don’t miss a thing!
Follow me on Twitter, Facebook and Instagram. Or why not subscribe to Productive Blogging and get blogging and productivity tips straight to your inbox every week?
Pin this post to read later
*This blog post contains affiliate links, this means if you click on a link and go on to buy the product I recommend, I will get a small commission, but you will not be charged a penny more – thanks in advance!
very helpful article thanks for sharing
You are welcome! I’m glad to hear you found this useful. Eb 🙂
How do I put a new blog post into my Email
Hi Hazel, to get the email to automatically send out your latest blog post, you need to create an RSS campaign. This article explains how to do it step by step >>> https://www.productiveblogging.com/automated-email-newsletter-mailchimp/ Hope that helps! Eb 🙂
I want the email sent from my blog. I get paid from adsense through my blog, I don’t really want to send it from mailchimp and I want my subscribers coming to my blog. How do I arrange this?
Having an email ‘sent from a blog’ isn’t really possible. An email always has to be sent from an email address. (Though, of course, you can set up an email address which is YOURNAME@YOURBLOGURL.com) To send emails to your subscribers, you will need to use an email service provider, such as Mailchimp or ConvertKit. To get people to come over to your blog after they receive your email, you will need to first get them to open your email and then click on a link to your blog (for example your most recent article). You may find these articles helpful:
https://www.productiveblogging.com/improve-email-open-and-click-rates/
https://www.productiveblogging.com/email-marketing-for-bloggers/
https://www.productiveblogging.com/make-money-email-list/