ConvertKit vs MailChimp – which is best for your blog?
I may get paid commission for purchases made after clicking a link in this post.
MailChimp vs ConvertKit? Two of the most popular email services for bloggers – but which is best for YOUR blog? In this post I share my personal experiences with both platforms and give you all the info you need to make your decision.
If you are not yet on the email marketing bandwagon, you need to be!
In these days of unfathomable algorithm changes and the constant frustration of your most ardent followers never seeing your stuff, email marketing offers a simple way to collect a list of your most engaged readers and communicate directly with them.
No algorithms.
No hoops.
No verbal gymnastics to ensure you avoid the ‘banned words’ or select the ‘right’ hashtags.
And much less competition for your attention! (Think about how many emails you get a day vs how many social media posts you see…)
Just you, writing directly to your readers, about anything you choose and knowing that almost everyone on your list will at least SEE your email.
READ MORE >>> Why every blogger NEEDS an email list
Which email marketing service is best for bloggers?
But assuming you are thoroughly convinced that email marketing is the way to go, which email service provider should you go with – there are hundreds of them!
Names like… Mad Mimi, AWeber, Constant Contact, Infusionsoft, SendinBlue, GetResponse, Drip, MailerLite, ActiveCampaign… and of course MailChimp and ConvertKit.
It’s enough to make your head spin!
I’ll be honest here – I have only used two of these: MailChimp* and ConvertKit*, which is why this article is only going to compare MailChimp and ConvertKit – I believe in giving advice about what I actually know about (not making things up in order to get a few affiliate sales, as you’ll see in many reviews!)
Ahem, talking about affiliate links… just so you know, I am an affiliate for both MailChimp AND ConvertKit. So yes, I do get a small commission if you do choose to go on and buy one of these services using my affiliate links (clearly marker with a *).
But the fact that I’m an affiliate for BOTH also means I have no vested interest in which one you choose (unlike you’ll find in many reviews). In fact my only interest here is to help YOU choose the right email service for YOUR blog. (But if you’d like to say ‘thank you’ for the free advice, by using one of my affiliate links, I won’t say no!)
MailChimp and ConvertKit are both designed with small businesses and bloggers in mind (though there is a difference – more about that later) and they are also two of the most popular email platforms among bloggers.
I have a strong personal favourite (more about that later), but I also think that they are BOTH good choices – in different circumstances and for different types of bloggers.
My personal Experience with MailChimp and ConvertKit
Before I start on sharing the pros and cons of MailChimp and ConvertKit, I want to share with you my own personal experience with both these platforms.
I’ve been using MailChimp since early 2017 (before then I used Jetpack to email my subscribers – whatever you do, don’t do that!) and ConvertKit since mid 2018.
I use MailChimp for my food blog, Easy Peasy Foodie, and ConvertKit for Productive Blogging.
I much prefer ConvertKit… for all the reasons you’ll find below. And if I was starting a new blog tomorrow, I would definitely choose ConvertKit for it – without a second thought.
The main reason Easy Peasy Foodie is still with MailChimp is because it would be a bit of a pain to move it (not so much the subscribers, but all the automations and integrations I have set up) and because I have pretty basic needs for my Easy Peasy Foodie email marketing – I can do everything I need to (at the moment) with MailChimp.
I can definitely foresee a time in the future when I’ll move Easy Peasy Foodie over to ConvertKit, though.
However, as I’ve said above already, just because ConvertKit is right for ME, doesn’t mean it’s necessarily right for YOU.
This article is all about me sharing honestly with you the pros and cons of each to help you make a decision that is right for you and your blog.
Reasons why ConvertKit is better than MailChimp
1. Ease of use
This is really my reason 1, 2 and 3!! ConvertKit is SO MUCH EASIER TO USE than MailChimp.
This should tell you something… I’ve been with MailChimp for much longer than I’ve been with ConvertKit, yet I know my way around ConvertKit so much better!
ConvertKit is really intuitive, they have great videos you can watch* to help you learn how to use the platform, an amazing knowledge base* full of helpful articles, and they put on brilliant webinars all the time, which also show you how to use all the features.
But mostly I don’t need to watch videos or read tutorials to find out how to do something… because it’s really easy! And if I can’t figure it out, the support’s amazing (more about that later).
MailChimp on the other hand is so UN-INTUITIVE!
Maybe it’s just me, but I find that, outside of sending a simple email, everything is way more complicated than it needs to be. Or you need to use a hyper complicated workaround involving a third-party plugin, whereas on ConvertKit I could do the same thing in 2 seconds via a simple rule or automation.
Please tell me I am not the only one who finds MailChimp HARD WORK?!
2. It’s designed for bloggers
While ease of use is my number 1 reason to choose ConverKit over MailChimp, this one comes a very close second. Quite simply ConvertKit is designed with bloggers in mind.
They know you are a one man (or woman) show and can only dedicate a small amount of time to email marketing per week – which is why they make it easy.
They don’t put in a load of extra features that bloggers don’t need, and which make the whole experience more complicated than it needs to be (MailChimp – I’m looking at you here!)
Instead, ConvertKit tailor the whole experience to what bloggers really need
- great looking forms and landing pages
- easy to create automations and rules
- the ability to tag subscribers – so you send the right subscribers the right emails
- the ability to create multiple opt-ins – without tying yourself in complicated knots or paying for the same subscriber twice…
- very easy to send a quick email blast to all your subscribers (or whichever subset you choose)
- equally easy to put any set of subscribers you choose into a sequence of emails (e.g. welcome series, free email course, sales funnel…)
- easy to understand analytics
This is in contrast to MailChimp, which is designed much more around the needs of ecommerce – there are a lot of bells and whistles you get from MailChimp that you don’t need as a blogger, whilst the things you really do need to do as a blogger are far more complicated or not available unless you use a really long-winded workaround.
3. Incredibly helpful support staff
I haven’t had to use the customer support at ConvertKit for much (for the reasons I’ve explained above) – but when I have it’s been amazing: fast and super helpful.
There’s a chat box in the corner of your screen and anything you get stuck on or can’t figure out by yourself – you can just hop in there and ask your question and get the reply straight back (and if no support staff are available right at that moment, they will email you back later).
There is support available from MailChimp – I’ve used it in the past and found it to be OK, though nothing like as helpful as ConvertKit.
But the big problem is that the support from MailChimp is not available AT ALL unless you are on a paid plan.
And since the main reason bloggers choose MailChimp over ConvertKit is because of MailChimp’s free plan, that’s a big issue!
(Did you know you can get ConvertKit free for up to 1000 subscribers*? And paid plans start at just $9 per month!)
4. Being able to have multiple opt-ins running at the same time
Another big reason to choose ConvertKit is because they make it super simple to create multiple opt-ins and have them all running at the same time.
Why is this so important?
Because this allows you to create much more targeted opt-ins – relevant to perhaps just a small subset of your readers, but which are therefore much more likely to work than a single, site-wide, opt-in.
So, for example, on Productive blogging I have
- a keyword research calculator opt-in on my step by step guide to keyword research for bloggers
- printable goal setting work sheets on my post about goal setting for bloggers
- a cornerstone content mini course on my post about how to use cornerstone content to increase blog traffic
All of these convert far better than the site-wide meal planning opt-in that I have on Easy Peasy Foodie.
Why?
Because they are targeted precisely at the needs of those specific readers – they give extra help and tools to the people who are most likely to be interested in them, right in the post they are reading.
And do you know how long it takes me to put an new opt-in on my site using ConvertKit? Less than 5 minutes! It’s as simple as creating a new sign-up box, checking a couple of boxes and attaching a PDF.
You just can’t do this in MailChimp. Well OK you sort of can – there are workarounds using third party plugins (often paid ones) and a lot of mental gymnastics. I’ve read about them and just reading about them makes my brain go fuzzy, let alone actually trying to implement them!
The other way to do this in MailChimp is that you can create separate lists for each separate opt-in… but then you run the risk of a) having to pay for the same subscriber multiple times (see below) or b) sending your email campaigns out to the same subscriber more than once – definitely not cool!
READ MORE >>> How to grow your list with a free opt-in offer
5. You only pay for each subscriber once
This is a big one! In ConvertKit you have one big list and a subscriber can only appear on that list once.
That means you could be running two or three blogs all from the same list, but only paying for each subscriber once. (You just create segments to ensure the right subscribers get the right emails.)
Contrast that with MailChimp, where you have separate lists and, if a subscriber is on multiple lists, you might end up paying multiple times for that same subscriber.
Again, there are workarounds in MailChimp that you can employ to avoid that, but they are complicated – whereas ConvertKit makes it the default.
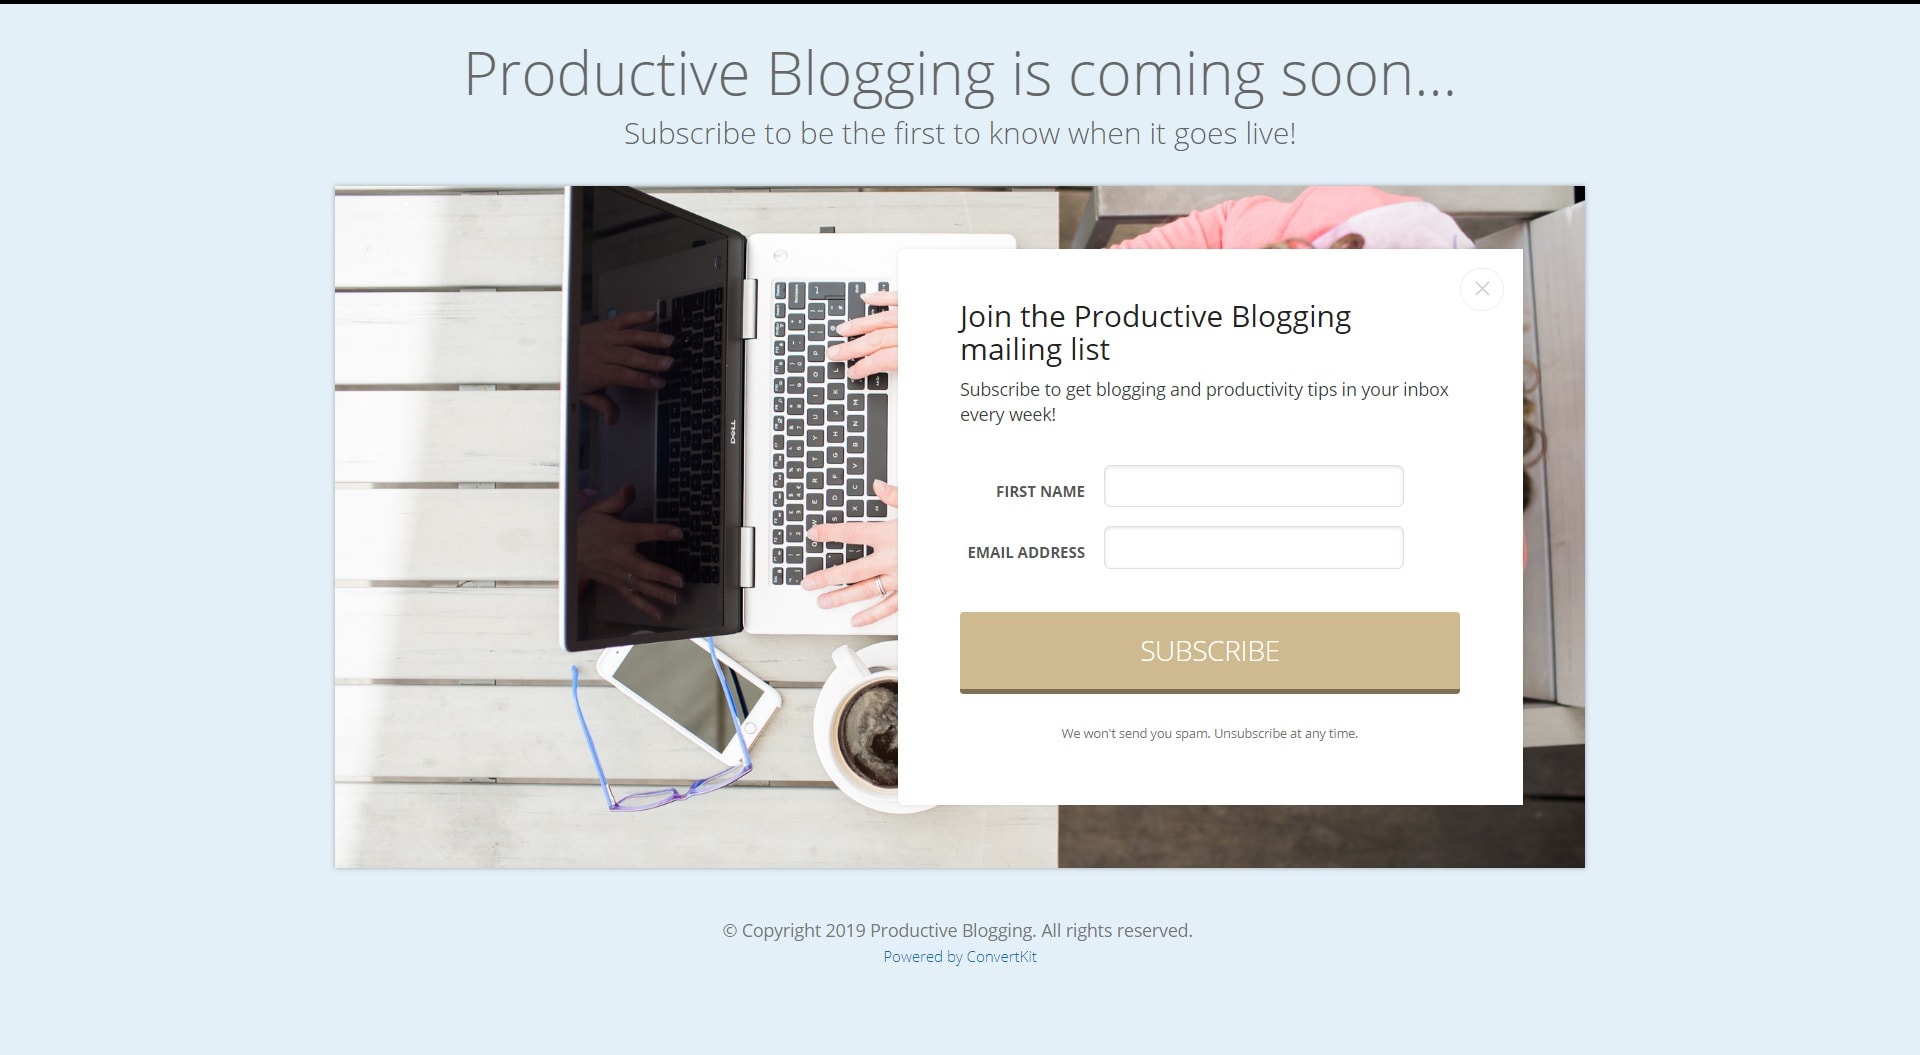
6. Attractive signup boxes and landing pages
Another pro for ConvertKit – they make it super easy to create attractive forms AND landing pages for your blog – ones which look really professional, WITHOUT having to pay a designer!
And if you are have a Restored316 theme too, it gets even better as Restored316 have styled ConvertKit signup boxes built right into their theme… like the ones you see dotted round my site.
This is not the case with MailChimp – I find creating a form in MailChimp to be unbelievably complicated and unintuitive… and the result is far from attractive – unless of course you have a Restored 316 theme (which comes with styling for MailChimp too), or a designer who can create a bespoke one for you.
7. Unlimited emails and features
Another plus for ConvertKit is the fact that all their main features are available on their lowest priced plan*:
- Unlimited landing pages
- Unlimited forms
- Unlimited broadcasts
- Audience tagging and segmentation
- Sell digital products & subscriptions
- Live chat & email support
- Free migration from another tool
- Automated email sequences
- Visual automation builders
- Third-party integrations
So whether you have 50 subscribers or 50,000 subscribers – you get the same great features, the same great customer support, you can create an unlimited number of sign-up forms and you can send an unlimited number of emails.
Contrast this with MailChimp where there are maximum monthly email send limits (even on very expensive plans!) and many features are not available to you on their lowest priced plan.
8. The download button IS the subscribe button
This one makes a massive difference. When you create an opt-in, you can set things up so the download button is also the subscribe button.
What does that mean?
Well, typically, when you set up your email list, you enable double-opt in. This ensures you only get real subscribers and avoid getting spam/fake email addresses joining your list. It can also help you ensure compliance with data protection rules.
The problem with this is that you have to send a confirmation email to your prospective subscribers BEFORE sending your free opt-in gift in a separate email.
That confirmation email does not usually look great (especially on MailChimp!) and is likely to put off many of those prospective subscribers (leading to lots of unconfirmed email subscribers). Even if that email did look pretty – just having to do one extra step is enough to lose a lot of potential subscribers!
Contrast this with ConvertKit, where you can send just ONE email with ONE button which is both the download link AND the double opt-in button (obviously you need to make it clear to your potential subscribers what they are signing up for).
With ConvertKit you have free reign to craft this email as you wish (no generic text like MailChimp has) – including a clear subject telling your potential subscribers to open the email to get their free download.
All your prospective subscriber has to do is open the email and click the download link. They get the freebie they wanted immediately, you get the confirmed subscriber – genius!
9. You can track stats of your sign-up forms
Want to track the conversion rates of your various opt-in offers and sign-up forms?
That’s easy in ConvertKit!
On the ‘forms’ page, you get an easy to understand bar chart showing which sign-up forms and opt-in offers people have used each day, as well as detailed statistics on how many people have seen each sign-up form and how many of those visitors have gone on to subscribe using each form.
This is a great way to see what is working (so you can create more of the same!) and what is not (and so delete / change / etc.).
For example, it helps me see that – though my side bar opt-in form gets seen by a lot of visitors each day… it’s conversion rate is terrible! (In fact I’ve had just 4 subscribers sign up from my side bar in the last 6 months… Compare that with an opt in I created less than a week ago, which has only been seen by a small fraction of my readers, and yet has already generated many times that number of subscribers! In fact, it has a 26% conversion rate. Seriously, if you still only have an email sign up box in your side bar, it might be time for a rethink!).
Whilst it is possible to do this with MailChimp, you would have to pay for an extra plugin to get that level of detail.
10. Ridiculously easy to exclude new subscribers from your regular mailings
Do you have an automated email sequence which you send to welcome your new subscribers? (If not you really should – here’s how to create an automated welcome sequence for your email list)
One thing that you probably don’t want to have happen, is for your new subscribers, who are going through your welcome sequence, to get your regular mailings at the same time.
Not only will it be confusing, but it will also be waaay too many emails all at once and is quite likely to make your new subscriber hit that unsubscribe button pronto!
On ConvertKit, it’s super easy to set up a quick rule to ensure new subscribers going through your welcome sequence, don’t also get your regular mailings.
You can also set things up so subscribers doing a free email course or a sales funnel don’t get your regular mailings either.
And you can ensure subscribers who have already bought one of your products don’t get sales emails for that product… or any rule you care to make!
This is something which you just can’t do in MailChimp. (Well, maybe there’s a complicated workaround to allow you to do it – but with ConvertKit it’s built in and super easy!)
11. Easy to tag subscribers and create rules
In fact, you can tag subscribers and create rules about anything you like in ConvertKit!
Want to tag all the subscribers who click a certain link, so you exclude that group from a particular mailing later on? You can do that in a couple of seconds!
Want to create a rule that anyone who takes your free email course gets sent a discount coupon for the paid version of that course, or put into a sales funnel for that course (or both!) – again it just takes a couple of seconds.
Want to allow people on your list to opt out of (or into) a certain kind of email – easy peasy!
This last feature is truly awesome. If you are currently focused on selling a product, you can give your subscribers the option to ‘opt-out’ of sales emails, but still stay on your list for regular mailings. These are known as ‘link-triggers’ and can be created in a matter of minutes.
This kind of thing is either just not possible in MailChimp, or else it involves a long and complicated workaround… or a (most likely paid-for) third-party plugin.
12. Visual Automations
Another insanely cool feature of ConvertKit is their visual automations. You can craft a whole beautiful sequence for your subscribers to follow in a really visual manner (great for visual people like me!).
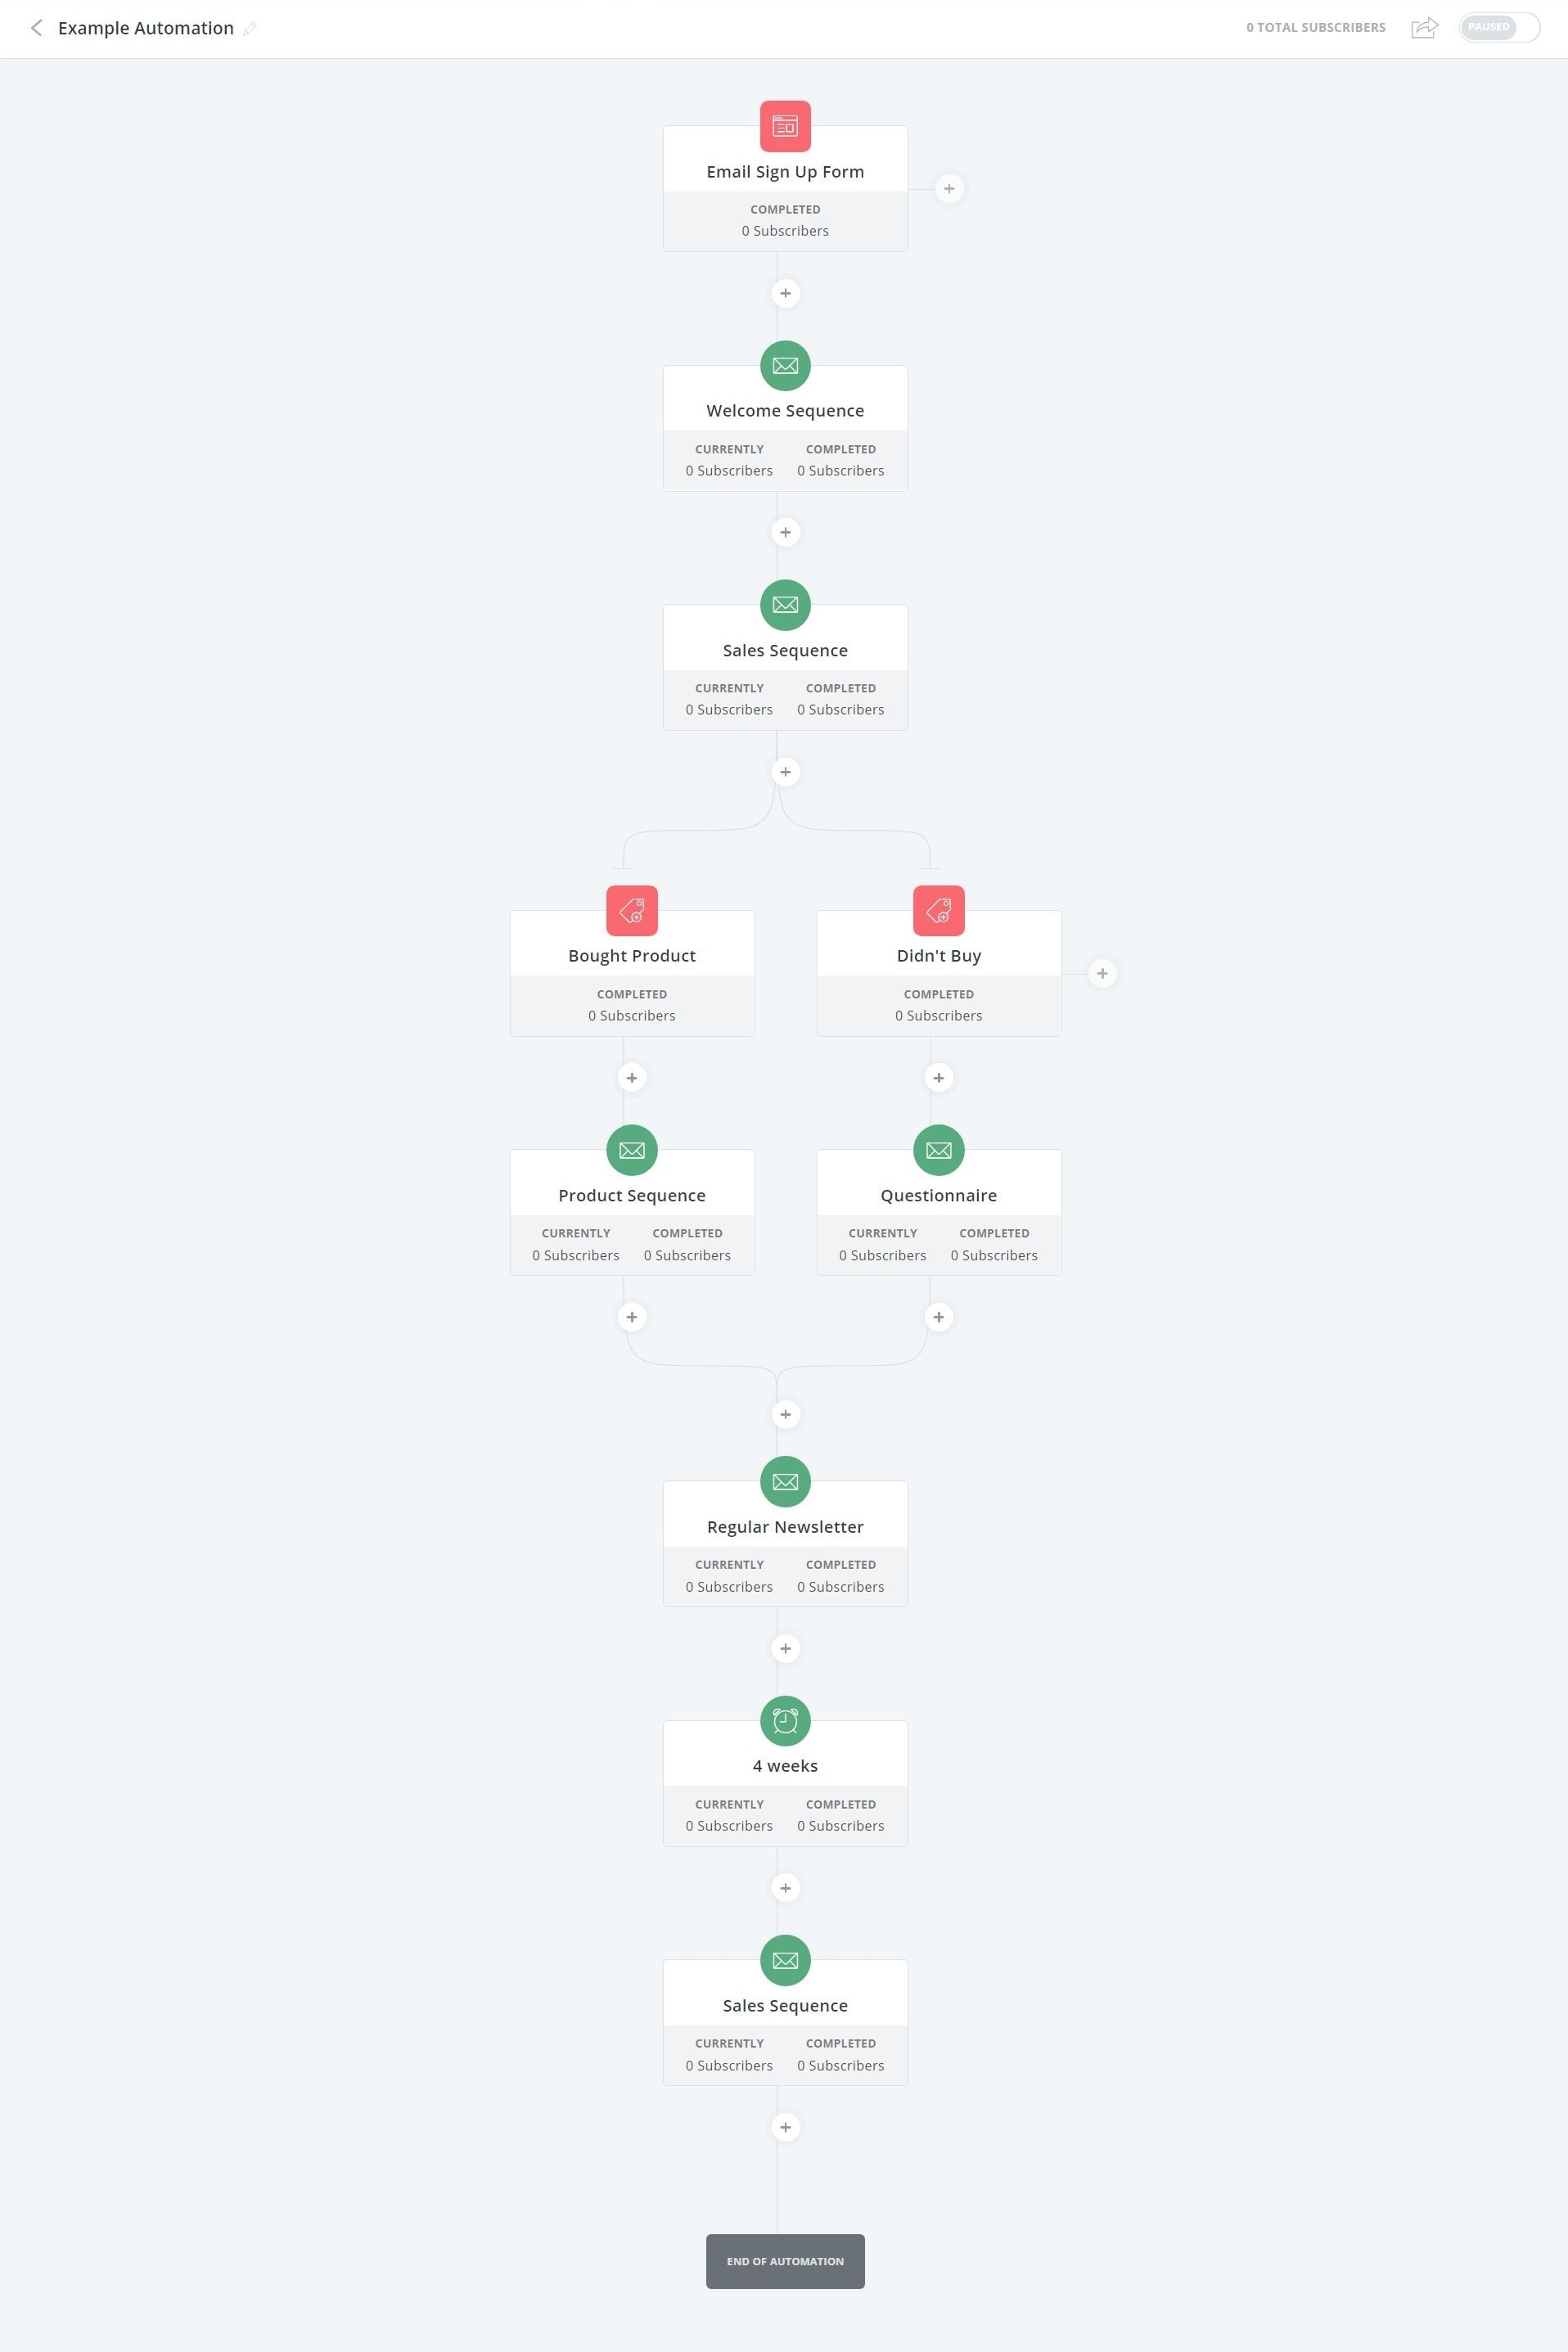
For example, imagine an automation where a subscriber joins your mailing list and gets your welcome sequence, then they receive a sales sequence featuring one of your products.
If they buy the product, they are filtered into a sequence designed for customers of that product.
If they don’t buy that product, they are instead sent a questionnaire email which aims to find out why they didn’t buy that product and/or what kinds of products that subscriber might be interested in.
Finally, all new subscribers are dropped into the main group where they receive your regular mailings (and no special sequences).
You could even add a delay, so you leave them alone for say 4 weeks, before trying to sell them a different product.
Sounds a bit complicated, right?
But when you can visually SEE it, it’s so much easier.
Well, with ConvertKit YOU CAN!
This is what that sequence looks like in ConvertKit’s visual automations…
(BTW – it took me less than 5 minutes to create this example automation!)
And you can set up visual automations for anything – welcome sequences, sales funnels, highlighting affiliate links and/or special offers, specific teaching sequences, email courses, different sequences depending on what they click in an email… and so on – really the only limit is your imagination!
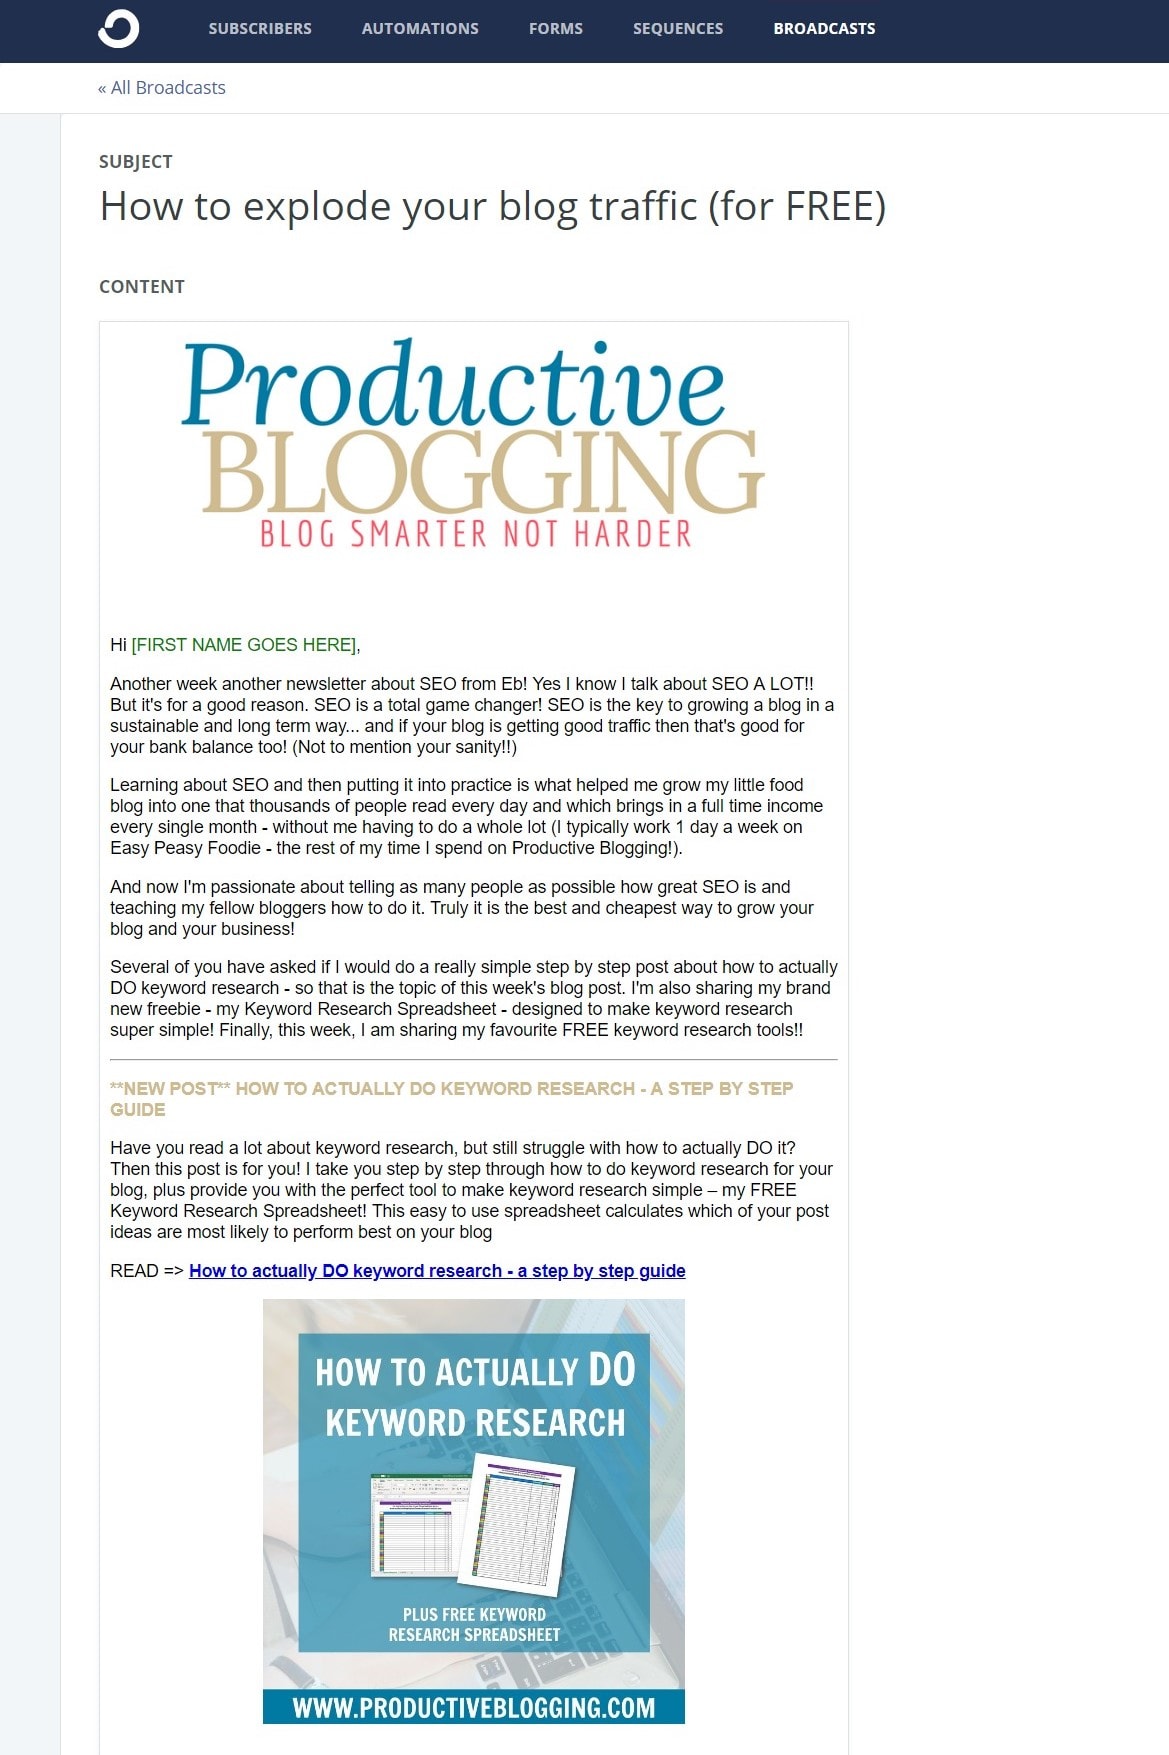
13. Simpler emails = better open and click rates
This last one is kind of a pro and a con all rolled into one. You see on ConvertKit you don’t get the fancy shmancy email templates you can get on other platforms (including MailChimp – more about that in a bit).
Buuut it’s for a good reason. ConvertKit have done some testing and concluded that readers are more likely to open and act upon emails which look like normal emails from a friend vs fancy emails which look like they come from a big company.
Normally looking professional is a good thing for us bloggers, but not in this case!
Emails which look ‘normal’ – i.e. no fancy template are less likely to end up stuck in the spam filter and much more likely to get opened. Moreover, emails like this reinforce the fact that you are a real person they can trust, not a big faceless corporation.
With emails it really is a case of less is more.
I realise I am not exactly comparing like for like, but in my experience, I get much better open and click through rates with ConvertKit than with MailChimp.
Want to try ConvertKit for FREE??
Convinced already you want to get ConvertKit? You can try ConvertKit today for FREE*
Want to know more about the features of ConvertKit? Read my beginner’s guide to ConvertKit
Or read on to find out more about the advantages of MailChimp…
Reasons why MailChimp is better than ConvertKit
1. Prettier emails
There’s no denying it – MailChimp does offer prettier emails and a lovely drag and drop email builder to create them. If having that functionality is important to you, then you may be more suited to MailChimp.
Do bear in mind though that this is probably not the best choice if you want to get the best open and click through rates, nor if you want your readers to perceive you as a real person they can trust, rather than a faceless corporate entity.
To read more on this subject, I highly recommend reading this article on Why beautiful email templates hurt your business.
2. You can run two (or more) separate lists
If you have two separate blogs, or for some other reason want to keep two very separate lists, then you may prefer MailChimp.
Whilst it is completely possible to keep subscribers to different blogs separate on ConvertKit, they will not be on separate lists.
The downside of having separate lists is you generally end up paying for the same subscribers more than once…
But if you can live with that, and for whatever reason you REALLY NEED to have your subscribers completely separate, then MailChimp is probably the way to go. (Either that or getting TWO ConvertKit accounts!!)
3. Its free for up to 2,000 subscribers
The big one – and pretty much the number one reason why bloggers choose MailChimp over ConvertKit.
Yup, there’s no getting round it – MailChimp is free for the first 2,000 subscribers and ConvertKit is only free for the first 1,000 subscribers.
After that, on both platforms, the price increases according to how many subscribers you have.
It’s difficult to compare MailChimp and ConvertKit prices exactly, as they use different price breaks and sometimes MailChimp is cheaper, sometimes it’s ConvertKit!
But if you really don’t have any money to spend on your blog right now and you have between 1,000 and 2,000 subscribers, MailChimp is your obvious choice!
**DID YOU KNOW? ConvertKit now have a free plan! Find out more here >>> CONVERTKIT FREE PLAN**
Want to try MailChimp?
If you are totally convinced MailChimp is for you SIGN UP HERE*
Want to learn more about the features of MailChimp? Read my beginner’s guide to MailChimp
Or read on to find out which email marketing platform is right for your blog…
ConvertKit vs MailChimp – which is best for your blog?
Wow, when I first set out to write this post, I didn’t quite expect it to look like what I’ve just written.
Honestly, I thought my article was going to be a little more balanced.
I mean I knew ConvertKit was my favourite, but MailChimp’s OK! It’s not awful.
But it turns out there are a lot more reasons to choose ConvertKit than MailChimp!
But honestly, here’s what I think…
Choose MailChimp if…
- blogging is just a hobby or something you dabble in
- you have no real desire to make money from blogging
- you really, really need those pretty templates!
- you have the time. headspace and technical ability to employ all the workarounds you need to make MailChimp do all the things that come as standard on ConvertKit
- you really like banging your head against a brick wall!
- you’ve been using MailChimp for a really long time and can’t face changing now
- your email needs are very simple
Choose ConvertKit if…
- you are serious about blogging as a business, not a hobby
- you want to make money from your blog
- you sell products or intend to sell products on your blog in the future
- you can afford to pay a small amount of money to make your life much easier!
- you care more about open and click rates than how pretty the email is
- you don’t have a lot of time to faff around figuring workarounds
- you want email to be quick, easy and painless
- you do not enjoy banging your head against a brick wall!
- you want to be able to have more than one opt-in
- you want your email list to grow FAST
- you are a really visual person
- you want to take your email marketing to the next level
Don’t get me wrong, MailChimp is a perfectly acceptable email marketing service. It does the basics and there are workarounds if you want to do something more complex. But just know that you are probably going to have to go through the pain of switching email service provider in the future.
However, if you can afford to invest a small amount in your blog and you are serious about wanting to make money from your blog, then for me, it’s ConvertKit all the way. You’ll grow your list faster, you’ll have all the automations, rules, tags and sequences you need to make your business (and your bank balance!) grow and you’ll spend a lot less time banging your head against a brick wall!
(And now ConvertKit have a FREE PLAN* there’s really no reason NOT to go with ConvertKit now!)
Want to know more about email marketing?
If you’ve enjoyed this post you may like to read more about email marketing. Here are some of my most popular posts on this topic…
- A beginner’s guide to email marketing for bloggers + free challenge
- How to grow your email list with a free opt-in offer
- 10 reasons why people are NOT signing up to your email list
- How to create an automated welcome sequence for your email list
- 26 reasons why ConvertKit is the best email marketing service for bloggers
Any questions?
I’d love to help if you have any questions about this topic – or if you’d like to tell me about another email marketing service you really rate! Let me know in the comments below or over in the Productive Blogging Community.
Don’t miss a thing!
Follow me on Twitter, Facebook and Instagram. Or why not subscribe to Productive Blogging and get blogging and productivity tips straight to your inbox every week?
Pin this post to read later
*This blog post contains affiliate links, this means if you click on a link and go on to buy the product I recommend, I will get a small commission, but you will not be charged a penny more – thanks in advance!
**Price correct at 22/08/22






This post may have saved me from quitting my blog before I ever started!!!!! I was trying to figure out mail chimp and getting so frustrated! I am so glad I searched Pinterest for help and found you!!!! Thank you! I have done more on Convertkit in an hour now then I’ve done in most of the day on mailchimp!!!!
Yay! I am so pleased to hear that – and I totally agree, I find ConvertKit much easier to use than MailChimp. Best of luck with your new blog! Eb 🙂
Necropost! I wandered in here from a Google search. Beautiful website! I love how you made your own reaction photos rather than using stock photos. You have really sold me on Convert Kit. I am working on an online WordPress course, and I might give ConvertKit a try when I’m ready to launch. Now I just need to hold onto this post to click on your affiliate link. =]
Thanks – so pleased you found my post helpful 😀 And thanks in advance for using my affiliate link! Eb 🙂