How to start and grow a successful Facebook group for your blog
I may get paid commission for purchases made after clicking a link in this post.
1.4 billion people participate in Facebook Groups every month. Here’s how to harness the power of Facebook groups to grow your blog traffic and blogging income. (Spoiler alert, it’s not by spamming your group with ‘read my blog post’ and ‘buy my products’ messages!)
Facebook has over 2 billion active monthly users. When it comes to marketing your blog, it’s definitely a platform that should not be ignored. Unfortunately, over the last few years Facebook have been tinkering away at the algorithm in a way which means most bloggers now reach far fewer people through their Facebook page than they used to, back in the good old days.
But there is some good news… There is one place where it’s still possible to consistently reach and engage with your audience, without having to pay – a Facebook group!
A whopping 1.4 billion people participate in Facebook Groups every month. Many bloggers take advantage of this huge opportunity by sharing their blog posts in other people’s Facebook groups. But there is a much better way to harness the massive potential of Facebook groups, and that is to create your own!
Creating a group of your own is a highly effective, free and much more time efficient way to reach your target audience – and best of all, you are in complete control! The benefits of building a successful Facebook group also go way beyond simply increasing your blog traffic (see below).
However, you can’t just create a Facebook group and then expect it to automatically thrive. You need to put the hard work in, and you need to have the right strategies.
In this post, I’m going to cover everything you need to do to start and grow a successful Facebook group for your blog.
But more than that, I am going to show you how to get people to stay in your group and actively participate.
AND I’ll show you how to use your Facebook group to build a strong community around your blog, grow your authority, and ultimately how to translate all that into increased blog traffic and money in your pocket (spoiler alert, it’s not by spamming your group with ‘read my blog post’ and ‘buy my products’ messages!)

Facebook group vs Facebook page?
Before I go any further, I must answer a question I get asked all the time… ‘How is a Facebook group different to a Facebook page?’.
A Facebook group is actually VERY different to a Facebook page and you absolutely must treat it differently. One of the BIGGEST MISTAKES bloggers make with Facebook groups is treating them in the same way as they treat their Facebook page. That simply will not work.
I like to use my local village jogging group as an example.
Their Facebook page is like a kind of digital noticeboard. It’s the place where the club advertises the weekly club runs, the Christmas party, how to become a member, the latest race fixtures… The posts here might result in a few comments – questions for clarification for example, but mainly it’s about getting information out there to existing and potential members. Only the committee members can post on the Facebook page.
Their Facebook group, however, is a private, safe space for the group members to interact. The committee might post things like weekly club runs/the Christmas party/race fixtures, but the difference here is these posts are likely to get much more interaction as members say if they are coming or not, banter with each other and give feedback on how it went. And crucially these are not the only posts in the group. Group members are also allowed to post in the group and (in a well run group) this will be the majority of the posts. In the Joggers Group you’ll find group members arranging ad hoc meet ups, asking jogging related questions and sharing successes, for example.
Essentially, a Facebook page is about YOU telling your followers stuff you want them to hear. A Facebook group is about building a community.

3 reasons to start a Facebook group for your blog
OK, so now we’ve cleared up the difference between a Facebook group and a Facebook page, let’s look at the benefits of starting a Facebook group for your blog…
1. Much better organic reach than Facebook Pages
If you’ve watched your Facebook page reach dwindle over the last couple of years and have consequently written off Facebook as a waste of time, think again.
While it’s true that organic reach and engagement on Facebook pages is not what it once was, there is still huge potential in Facebook groups.
Why?
Because the quality and depth of interaction in groups are exactly what the Facebook algorithm is looking for!
In fact, Facebook themselves have come out and said that they have updated their algorithm to prioritise content from groups users frequently engage with. Groups by their very nature encourage frequent interaction and engagement, which the algorithm recognises as a positive signal and, as a result, shows that content to more people who also engage and respond, resulting in a virtuous circle.
2. Connect with your readers on a personal level
Groups allow you to connect with your readers on a very personal level.
This works both ways… your group members get personal access to you: they can pick your brains, give you feedback or just have a bit of a chat.
But engaging with your audience on a personal level makes you seem more human and less of a faceless corporation. Your readers are consequently more likely to trust your advice, care about you, go to your blog rather than anyone else’s for what they need, tell their friends about you and, ultimately, buy from you.
Plus, by seeing you as a real human being, they are much more likely to interact with your group posts when they pop up in their feed – feeding the algorithm with yet more positive signals and thereby resulting in an even better reach for your posts.
3. Amazing market research
I have said it repeatedly and I will continue to say it until I am blue in the face, but the absolute key to a successful blog is to KNOW YOUR AUDIENCE.
The better you know your audience, the better you will be able to write blog posts they want to read, create opt-in freebies they want to sign up for and, most importantly, create products they want to buy.
And Facebook groups give you the most incredible information about your audience. You can ask almost unlimited questions, read what your audience are struggling with, probe further to really get to the heart of the problem and even use the specific language your readers are using to express their problems in your email marketing and sales copy, making it waay more effective! (<<< Pro copywriting hack right there!)
In short, Facebook groups give you access FOR FREE to the kind of breadth and depth of market research businesses would normally pay top dollar for.

Before you start your Facebook group
Once you realise the potential of Facebook Groups it’s easy to get carried away in a rush of excitement and head straight over to Facebook to start setting things up.
STOP!
Whether or not your group is successful will depend, in large part, on the work you do BEFORE you start your Facebook group.
One of the biggest mistakes bloggers make when setting up a Facebook group is they don’t think about WHO their Group is for, what the PURPOSE of the group will be, and how they will define SUCCESS.
Who is your group for?
The first thing to determine is who your group is for. What kind of people do you want to attract into your Facebook group? Unless you are really clear about WHO your group is for (and by extension who it is NOT for), your group is unlikely to be a success.
Very much like choosing a niche for your blog, the general rule is, the more specific your group, the more successful your group is likely to be.
So, for example…
- A group for Siberian Husky owners is likely to be more successful than a group for dog owners generally.
- A group all about vegan baking is likely to be more successful than a general vegan group
- A group about budget UK travel is likely to be more successful that a general travel group
In fact, it might be that you decide that for your Facebook group, you actually want to target a small subset of your blog readers – perhaps you have a general parenting blog, but you decide your group will be all about parenting teenagers, for example.
You’ll also want to bear in mind any products you have for sale (or plan to create in the future). Does your target market for your group align with the kind of people most likely to want to buy your products?
What is your group’s purpose?
This part is also crucial. For your blog’s Facebook group to be successful, you need to be able to answer the question. ‘What’s in it for them?’
A group will ONLY be successful if there is a tangible benefit to the group members. Why would they want to join? What would they get out of it?
Ideally, you want to make your group so good that it’s the first thing your group members go to every time they check Facebook.
So, what would make it that good? What do your target audience really want?
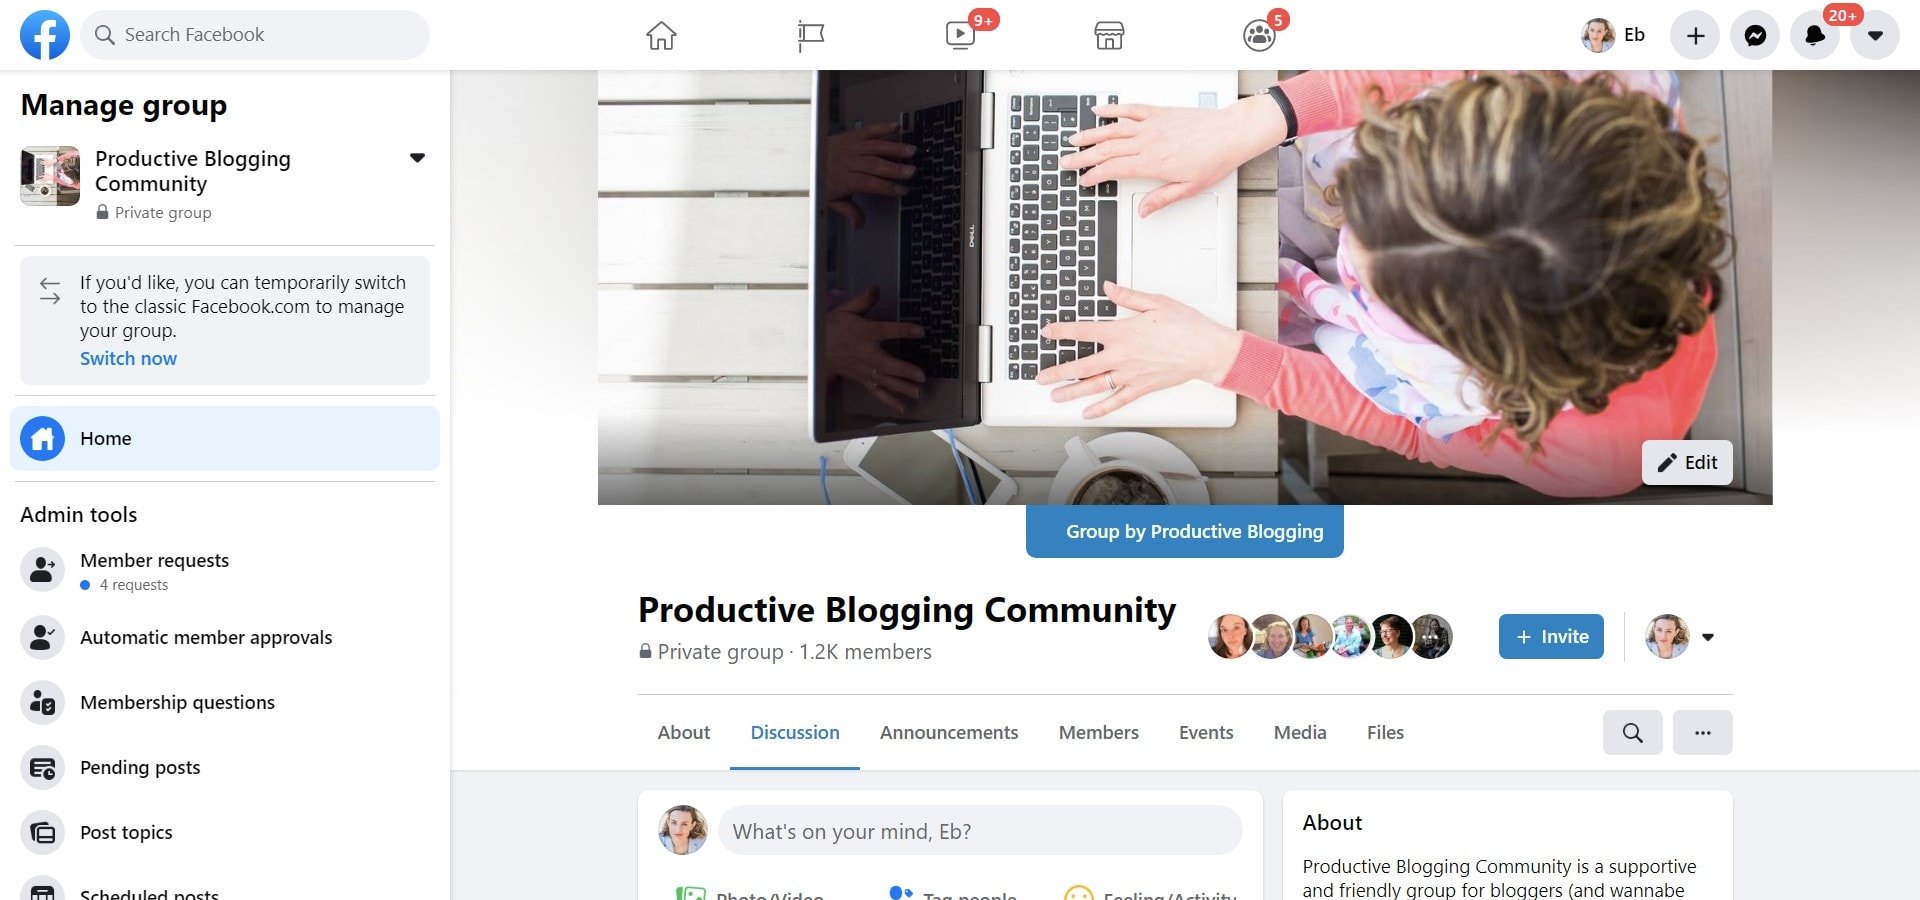
For example, the purpose of my Facebook Group, the Productive Blogging Community, is to give bloggers a supportive and friendly place to ask questions, share tips, celebrate successes and significant milestones, and generally chat with like-minded people.
I know that’s something my target audience really want – a go-to place to get an answer to a problem, somewhere you can get encouragement when you are feeling really down about your blog stats, a place to celebrate a significant blogging milestone that your friends/family etc. just don’t ‘get’ at all, a place to have a moan about yet another stupid blog comment, or yet another PR who has asked you to work for free…
How will you define success?
Now, I know what you might be thinking… but why on earth would I set up a Facebook group for the benefit of my audience? I want it to benefit ME!
And here’s the irony…
If you set up a Facebook group for your benefit (for example spamming it with a ton of ‘read this blog post’, and ‘buy this product messages’), your group will not be a success and so it won’t benefit you.
However, if you set up a Facebook group for the benefit of your members (a supportive place to ask for help, share tips, celebrate milestones etc.), your group will be a roaring success and that in turn will benefit you and your blog in all the ways I outlined above.
Which means you need to think carefully about how you define success (because how you define success will drive what you do).
Don’t focus on metrics like number of Facebook group members or how much traffic it drives directly to your blog.
Instead, concentrate on the quality of interactions. When you post in your group, how many quality engagements do you get? How many group members are posting in the group each day? How many genuine conversations happen in the group each day? What are group members saying about your group to other people? If you focus on these measures of success, I can pretty much guarantee that you will also see success in terms of traffic to your blog and sales of your products and/or services as well. (More about how this works below.)

Set up your Facebook group for success
This post is not a tutorial on how to set up a Facebook Group. For help with the technical side of setting up a Group, check out Facebook’s own tutorial.
But there are a number of things to consider when setting up your Facebook Group if you want it to be a success: the name, the cover photo, the ‘about’ section, the privacy settings and the rules.
A compelling name
Your group name is your group’s biggest selling point, so choose wisely! It could be you give your group the same name as your blog, but that might not be the best choice.
Remember you need to answer the question on your prospective members’ lips ‘What’s in it for me?’ and you want them to feel like your group is a gang they really want to join. AND you want them to know all that at a glance.
So, if your blog’s name is ‘Vegan Bakes’, your Facebook Group might be better named ‘The Vegan Bakers Club’ or ‘The Vegan Baking Community’ of ‘The Vegan Baking Society’ or ‘Vegan Bakers Rock!’
My blog is called Productive Blogging, but my group is called Productive Blogging Community, because I want to emphasise that this is a place where bloggers who want to be more productive and successful in their blogging can come and hang out together, learn from each other and cheer each other on.
A compelling cover photo
Your cover photo is the visual version of your Facebook group’s name. You want your cover image to convey what your group is about at a glance. Hard to do, I know. But not impossible.
So, going back to my vegan baking group example… The cover image could be a really gorgeous vegan cupcake… this sends a subtle message to your target audience that this group is for them – it’s clearly about baking, but it also shows that vegan baking can be just as good and just as showstopping as non-vegan baking. Something I’m 100% confident a passionate vegan baker will agree with.
A compelling description
To edit your Facebook group’s description, go to SETTINGS >>> SET UP GROUP >>> NAME AND DESCRIPTION
The description is visible to non-group members and can be seen by people searching for groups to join, so it’s a big opportunity to ‘sell’ your group. This is the place where you can explain exactly WHO your group is for and what its PURPOSE is (What’s in it for them?). Use your group description to make your Facebook group sound irresistible to your target audience.
For example, here’s mine…
‘Productive Blogging Community is a supportive and friendly group for bloggers (and wannabe bloggers) to ask questions, share tips, celebrate successes and generally chat with like-minded people about blogging and productivity.’
Set privacy settings
You can find your Facebook group privacy settings under SETTINGS >> SET UP GROUP. I strongly advise you make your group PRIVATE and VISIBLE.
A PRIVATE group is only visible to its members and only members can post there. This reinforces the idea that it’s a safe and supportive space and gives your group a feeling of exclusivity that ignites people’s FOMO and makes people really want to join. Making your group private will also mean your members will be much more likely to have the confidence to engage with the group. (And you will have to deal with much less spam!)
Setting your group as VISIBLE means your group can be found in searches. Assuming you want to grow your group, it’s important to set your group as visible! If you set it to hidden, only existing group members will be able to find it!
Set rules
I cannot emphasise this strongly enough, the success of your Facebook group depends on your rules.
For example, what are group members allowed to post and what are they not allowed to post? What kind of language is acceptable or unacceptable?
Emphasise the ‘dos’ as much as the ‘don’ts’, as this will give your members confidence to post things that you DO want them to post in the group.
And make sure you are clear that rude, abusive, disrespectful or nasty language and behaviour will not be tolerated (and what will happen if people do behave in this way!). Again this gives confidence to the people you really do want to attract that this is the kind of group they want to be part of and gives your group members confidence that they can post and comment freely without fear that someone will be nasty or unkind to them.
How to grow your Facebook group (with the right people)
Once you have set your Facebook group up, you want to start growing it. But you also want to make sure you grow it with the right people. A group full of people who aren’t a good fit for your group will not be successful.
Promote your group on your Facebook page
The first, and most obvious place to promote your group is on your Facebook page. People who have liked and who follow your page are very likely going to be a good fit for your Facebook group.
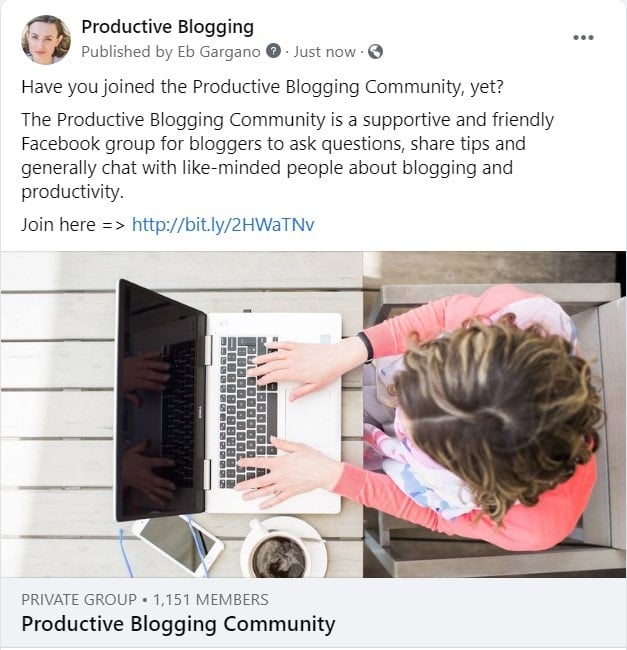
Start by creating a post inviting your Facebook followers to come and join your group. Make sure you make it clear who your group is for and how it will benefit your target audience.
Make sure you pin this post to the top of your Facebook page for maximum visibility.
You can also use the call to action button in the top right of your Facebook page (just below the cover photo) to encourage people to join your group. Simply click the pencil symbol and select ‘Edit Button’ then ‘Visit Group’ and select your group.
Invite your Facebook friends (only relevant ones!)
If you click the blue INVITE button at the top of your group, Facebook will give you the opportunity to invite your Facebook friends to the group.
Please, please, please, DO NOT invite all your friends.
Remember, though many of your friends may respond positively to your invitation (because they are your friend and want to support you), not all your friends will be a good fit for the group and having people in your group who are not a good fit will not contribute to the success of the group.
In fact, quite the opposite, if your group is full of the wrong kind of people this will make your group LESS successful.
If your group is all about dogs, only invite friends of yours who have dogs, or love dogs, or really want to get a dog in the future. Don’t invite people who hate dogs and only like cats!
Other social media channels
Don’t forget you can also promote your Facebook group on your other social media channels! You can create posts advertising the group on Twitter and Instagram, for example.
On Twitter, you can also use your pinned post.
On Instagram, you can also put a call to action in your bio and make the clickable link in your bio a link to your Facebook group. You could also create a story highlight for your group.
And don’t forget, if you use CoSchedule, you can add a selection of posts advertising your Facebook group to your ReQueue, so that you are regularly promoting your group across all your social channels on autopilot!
Invite your email subscribers
And, whatever you do, don’t forget to invite your email subscribers to join your group. Remember your email subscribers (if you’ve done your email marketing right) are likely to be your biggest fans and greatest advocates. These are the perfect people to invite to your group!
To start with, send a special one off email telling your subscribers all about the new group you’ve just created, what it’s for and what they will get out of it. The aim here is to get them as excited about the group as you are! Make sure you tell them how to join and do encourage them to invite others who they think would be a good fit for the group too.
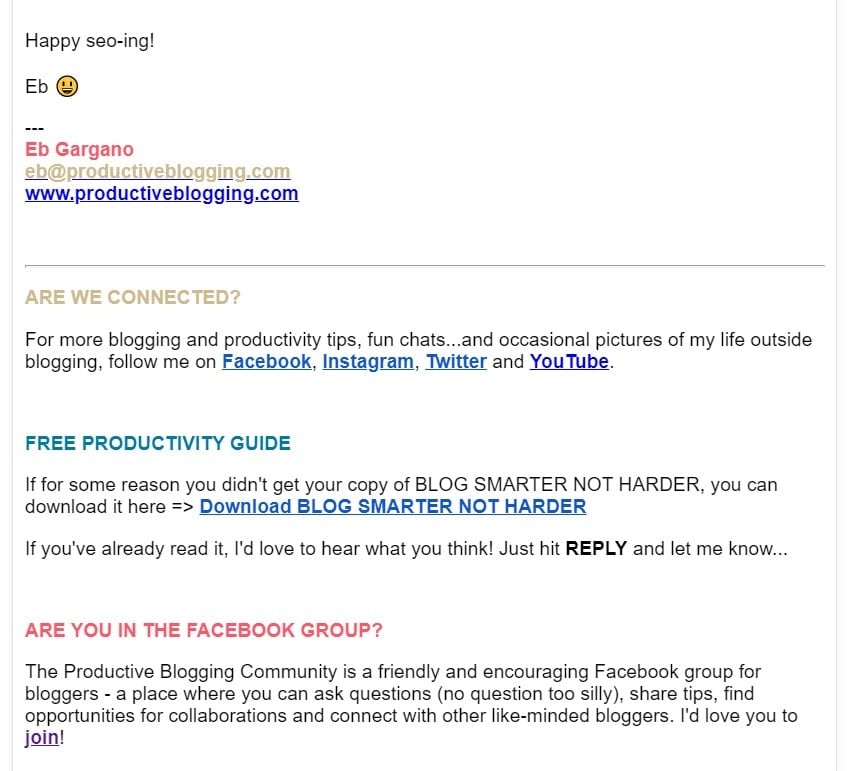
After that initial email, make sure you include a link to your group in every email.
I put a link to my Productive Blogging Community at the bottom of each email, below the sign off. Like this:
And, finally, don’t forget to include an invitation to your group in your welcome sequence!
Sprinkle links to your group all over your blog
There are tons of places where you can promote your group on your blog…
- Your homepage
- Your menu bar
- Your sidebar
- Your ‘About Me’ Page
- Your ‘Thank You’ (for subscribing) page
- Your ‘Contact Me’ page
- At the end of each blog post
- Within blog posts (where relevant)
You don’t have to do them all, but pick a few that you think will have the most impact.
In your freebies and paid products
Another great place to promote your Facebook group is in your freebies and paid products. If someone has signed up for a free opt-in offer, they are very likely to be a good fit for your group, and even more so if they have bought a digital product from you!
Better still, your group gives you a great way of helping your customers/students if they get stuck or need a bit of extra help.
I always encourage my course students to join my Facebook Group for support and encouragement while they do the course and I always prioritise answering my students’ questions in the group.
Encourage your existing members to promote your group
And finally, don’t forget to ask your existing group members to promote your group. Your existing members know your group well and so should instinctively know who else might enjoy and benefit from the group. In fact, if your group is good, you will find this happens automatically and that word of mouth becomes the main way your group grows in the long term.
Which brings me neatly on to…
How to make your FACEBOOK group successful
So far we have covered, what to do before you set up your group, how to set up your group and how to get the right people to join your group.
But just having a group with lots of people in it, does not automatically mean your group will be successful. Arguably, what is more important is getting people to stay in your group and actively participate.
Here’s how to do that…
Do not allow self-promotion by other group members!
Rule number one. Do not allow anyone (except you – see below) to do any self-promotion. Put this in the rules and make it very clear what will happen if people ignore this rule.
You might wonder why this is so important?
The reason is simple. If you allow self-promotion, that’s the only thing people will use your group for. Group members will simply pop into your group, dump their link and run. As a result, you will have a very boring group full of ‘read my blog post’ and ‘buy my product’ messages and nothing else. No genuine interaction, no discussion, just spam.
Limit your own promotion in your group
And, since you are asking your group members not to spam your group with self-promotion, don’t then do the opposite yourself!
Now, obviously this is your group and no one will be upset if you share your own links into the group occasionally – especially if it’s your latest blog post or a new product you’ve just launched. But be sparing. Make sure that the vast majority of the posts in your group are related to the purpose of the group (e.g. sharing tips, giving advice, celebrating successes etc.).
In my Facebook group, I have a kind of unwritten rule for myself that I only ever promote something of mine if it’s new or in some other way newsworthy. This usually means that I only share ONE promotional post per week (for my latest blog post) into my group. This is the complete opposite of what I do on my Facebook page, where I usually share five or more promotional posts per day.
This means the vast majority of posts in my Facebook group are about genuine human interaction – which is the hallmark of a successful group.
However, while I rarely promote my posts directly, precisely because Productive Blogging Community is such a chatty group, I still get lots of opportunity to share my blog posts. Whenever anyone asks for help on a subject I’ve blogged about, I will naturally reply with some tips and link to the post I have written on that subject for more information.
Post daily prompts
In the early days it can be hard to get the conversation going in a Facebook group. The best way to deal with this is to post daily questions that will encourage conversation on topics you KNOW your members will enjoy chatting about.
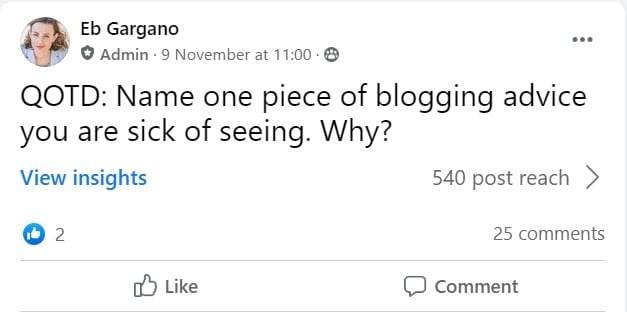
I still do this every day in my Productive Blogging Community. It’s called QOTD (Question Of The Day) and I post a QOTD every morning at 11am (UK time)
I ask questions like ‘What’s your favourite productivity hack?’, ‘Name one piece of blogging advice you are sick of seeing. Why?’ and ‘Biggest lesson learned this month – GO!’
Don’t be afraid to answer your own question if, after a couple of hours, no one else has replied. But if people do start to reply, I recommend hanging back and not jumping into the conversation immediately. Let your members go first and then, when the conversation seems to have stopped, jump back in and give your own answer, plus reply to as many members’ comments as possible. This usually restarts the conversation as people will reply back to you, which has the effect of pushing your QOTD back into people’s feeds.
Consistency really is key here… make sure there is a new QOTD every single day at the same time every day and your audience will come to anticipate it and thoroughly enjoy participating in it.
(And don’t worry about having to stand by your computer at the same time each day… you guys know I am all about batching! Use the ‘schedule’ feature and schedule out a batch of QOTDs once a week or even once a month.)
Model the kind of posts you want to see from your members
Of course, you don’t want the only posts in your group to be from you! Ultimately, you want the majority of posts to be from your group members. But in the early days they might be a bit shy or unsure about what to post. So, it’s up to you to model the kind of thing you want them to post.
For example, ask a genuine question you have about your group’s topic, share a great tool or hack you’ve just discovered or share a small niche-related win.
But don’t post too much, give space to allow others to post.
And, as others get more confident and chatty, take a step back from posting and instead spend your time replying to your group members posts – being helpful and encouraging. This will hopefully give more members the courage to post their questions, tips, success stories etc.
Engage with your group members daily
Do not neglect your group! Your group members are your VIPs and you should treat them accordingly. Make time every day to go into your group and engage with as many posts as possible.
When your group is new, it should be possible to reply to all the new posts and comments that come in, but after a while this will simply not be practical.
These days, in my Productive Blogging Community there are far too many posts and comments for me to even try to engage with every single one, so I have to prioritise. I set myself a time limit and, in that time, I focus on things like:
- Questions about my paid courses
- Questions about my blog posts and freebies
- Questions which have received no replies
- Questions which other members have replied to with bad or confusing advice
- Posts where a group member is sharing a significant milestone they’ve just hit
- My QOTDs
- Posts where people have specifically tagged me
But don’t talk too much
It’s important to engage with your group members on a daily basis… but don’t take this too far. If you, as the group owner, immediately jump on everything… that’s not a great group experience.
Give plenty of space and time for your group members to talk to EACH OTHER and develop relationships with each other.
A group where the group members are always happily helping each other out, chatting and encouraging each other is a far better experience than one where the group owner dominates everything.
The best way to achieve this is to only pop into your group once or, at most, twice a day. The rest of the time you can leave your group members to chat to each other!
Have a zero-tolerance policy for rule breakers
It’s all very well setting rules about self-promotion and acceptable behaviour, but these things won’t make your group successful unless you enforce them.
I have to admit, this is one of the less fun aspects of Facebook group ownership. But it is 100% necessary for the health of your group.
When someone breaks a rule, you need to deal with it. First you need to delete the offending message, then it’s up to you what you do next. Your options are
- Just delete the message and do nothing else
- Delete the message and send a quick DM explaining why
- Delete the message and remove the offending group member
I tend to do either number 1 or number 2 for the first infraction but repeat offenders get removed from the group. I simply do not have time to be sending endless DMs explaining my reasoning and soothing ruffled feathers. If someone is persistently breaking the rules, they are clearly not a great fit for the group and so I have no qualms about removing them.
That might seem harsh, but ultimately it is for the good of the whole group. It means my group members feel happy and confident to post and comment without fear that someone will be nasty to them or spam them.
Set up membership questions
You want to be really careful to make sure that only the right sort of people can join your group. Remember my example from above? You don’t want dog haters in your dog lovers group!
Facebook gives you the ability to ask MEMBERSHIP QUESTIONS and I really encourage you to use this for two reasons. Firstly to ensure that the right people are joining your group, but secondly to gather information about your members – specifically their main struggles and pain points related to the topic of the group.
For example, these are the questions I ask anyone who asks to be in my group:
- What is the URL of your blog? (If you don’t yet have a blog, just tell me what you plan to blog about.)
- What is your biggest struggle with blogging and/or productivity at the moment?
- What is your next big goal for your blog?
You should also make it clear that you will only accept new members who answer all the questions. This will help you spot and decline new member requests from bots and time wasters.
I put this statement at the beginning of my first question to make this clear
**PLEASE ANSWER ALL QUESTIONS TO BE APPROVED**
If someone fails to answer the questions but otherwise looks genuine, I send them a quick DM explaining that they need to answer the questions to be approved.
Only allow profiles (not pages) to join
This is a biggie. Do not allow people to join your group with their profiles! You want to build a community and encourage friendly one-to-one interaction and engagement. That’s very hard to do with logos and page names!
It’s kind of a basic human psychology thing – it feels a lot more like a normal conversation if I am chatting to Heather, Dave or Sam (and I can see what they look like), than if I am chatting to ‘Vegan Bakes’ ‘Budget Travel Adventures’ and ‘ToddlerCrafts’ and all I can see is their logos.
To make it so only profiles can join your Facebook group, simply head to SETTINGS >>> MANAGE MEMBERSHIP and select ‘Only profiles’ under ‘Who can join?’
Only admins can accept new members
Another really important one. Facebook has two settings: ‘Anyone can approve new members’ or ‘Only admins and moderators can approve new members’.
Unless you have a really good reason for doing otherwise, I highly recommend you only allow admins and moderators to accept (or decline) new member requests. This will allow you to maintain complete control over who can and can’t join your group.
Always welcome new members
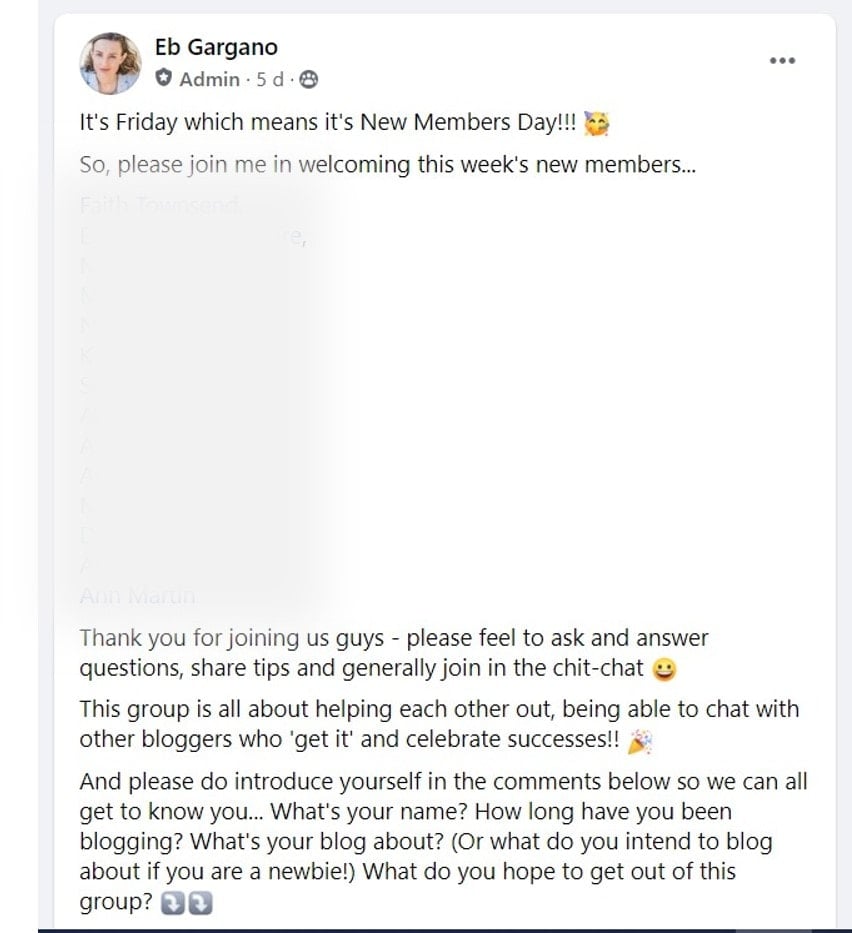
When someone new joins your group, you don’t want them to become a lurker. You want them to become an active member of the group. The best way to do this is by welcoming them into the group and asking them to introduce themselves.
Facebook makes this really easy: simply go to MEMBERS and you will see a section where it says NEW MEMBERS THIS WEEK and underneath WRITE WELCOME POST. If you click on WRITE WELCOME POST it will automatically open up a post with all the new members tagged (so they get a notification.)
You can then write a quick note to all the new members welcoming them and inviting them to introduce themselves. Like this:
Use your group for market research
Your group is an incredible resource to help you understand your audience better, so you can better serve your audience by creating blog posts, freebies and paid products which address their key struggles and pain points.
Ultimately, if you are producing blog posts, freebies and paid products which really help your members with the problems they are experiencing, this will not only help make your group a success, it will make your whole business a success.
You can use both your QOTDs and your membership questions, plus ad hoc posts to conduct this ‘market research’.
I suggest that you sometimes ask the question outright. For example: ‘I’m planning my new blog posts for the next quarter. What would you most like me to write a blog post about?’
But mostly, I would ask the question in a slightly more subtle way (because you tend to get better answers that way!) For example, ‘What is your biggest [YOUR NICHE]-related problem right now?’ or ‘Name one [YOUR NICHE]-related thing you wish you could do better.’
You should also search the conversations in your groups for common problems and pain points.
Sell to your group
If you have put the hard work in to build an incredible, supportive, encouraging and enthusiastic group AND you have carefully listened to your group and created a paid product that you KNOW your audience really needs, selling to your group should be easy.
After all, why would someone NOT want to buy something they really NEED from someone they really TRUST?
You can treat your group in a similar way to how you treat your email list – sharing little peeks behind the scenes as you create the product, inviting them to have input and generally getting them excited about this new course/ebook/printable/etc. you are creating.
Then, when you come to launch, your Facebook group will already be warm and enthusiastic about your product and be receptive to hearing more about it.
But don’t go overboard, don’t suddenly switch into hyper-salesman mode and start ramming your product down your Facebook group’s necks!
Be respectful of your group. Share details about your new product when you launch and a few subsequent reminders – especially on the last day, but otherwise stick to your usual schedule of daily prompts and friendly interaction.
If you have worked hard on creating a really great group and a really great product, this is really all you need to do.

Over to you…
Has this post inspired you to start your own Facebook group? Who will it be for?
Or do you already have a Facebook group? What tips will you take away and apply to your own group from this post?
Do you have any extra Facebook groups tips you’d like to share?
Let me know in the comments below!
- How to grow your blog by building a community
- 7 reasons why your blog needs a USP
- Beginner’s guide to Pinterest for Bloggers
- A beginner’s guide to SEO for bloggers
- A beginner’s guide to email marketing for bloggers
Don’t miss a thing!
Follow me on Twitter, Facebook and Instagram. Or why not subscribe to Productive Blogging and get blogging and productivity tips straight to your inbox every week?
Pin this post to read later

